八. 并发
1. 介绍
Java 并发是指在一个程序中同时执行多个任务的能力。Java 提供了多种并发机制来支持多线程编程、并发控制和任务调度等。在 Java 中,并发主要通过以下几种方式实现:
线程(Thread)
线程池(Executor)
同步(Synchronization)
并发集合类
原子变量
并发工具类(如
CountDownLatch、CyclicBarrier等)不同实例对象:每个线程访问不同的对象实例时,不会发生并发问题,因为每个对象有自己的实例变量,不会被多个线程共享。
同一实例对象:当多个线程访问 同一实例对象 时,可能会产生 多线程并发问题。主要原因是多个线程同时访问并操作同一个对象的共享资源(通常是实例变量),如果没有适当的同步机制,可能导致数据不一致、竞态条件、丢失更新等问题。
静态变量或共享资源:如果类中有静态变量或资源被多个线程共享,那么多个线程同时访问这些资源时可能会发生线程安全问题。这时需要通过同步机制(如
synchronized、ReentrantLock等)来保证线程安全。当多个线程访问同一类的 不同静态资源 时,通常不会引发并发问题,前提是 这些静态资源之间没有相互依赖或者共享的状态。
2. 线程
①介绍
进程:是操作系统分配资源的基本单位,每个进程都有独立的内存空间和资源,进程间相互隔离,通常需要特殊的机制(如管道、共享内存)进行通信。进程的创建和切换有较大的开销,适用于需要独立运行、互不干扰的任务。
线程:是进程中的最小执行单元,多个线程共享同一个进程的内存和资源,因此线程间通信非常高效。线程切换的开销较小,适用于需要并发执行、共享资源的任务,但需要特别注意线程安全的问题。
Java 的基本并发单位是线程。
Thread类和Runnable接口是 Java 提供的多线程编程的基本组成部分。Thread 类:表示一个线程,可以通过继承
Thread类来创建线程。Runnable 接口:比继承
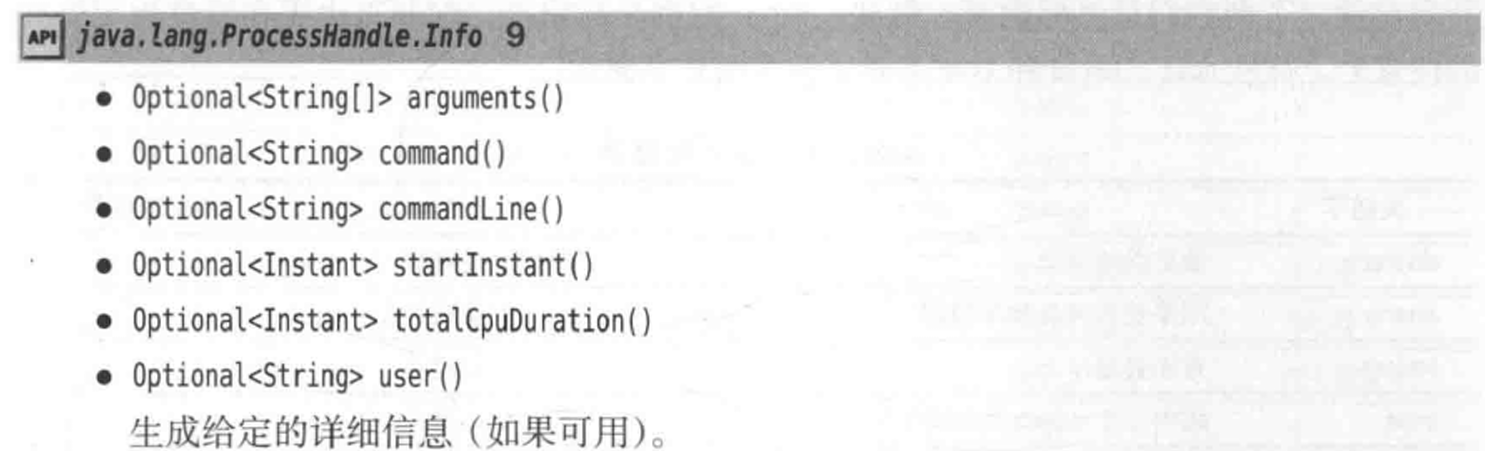
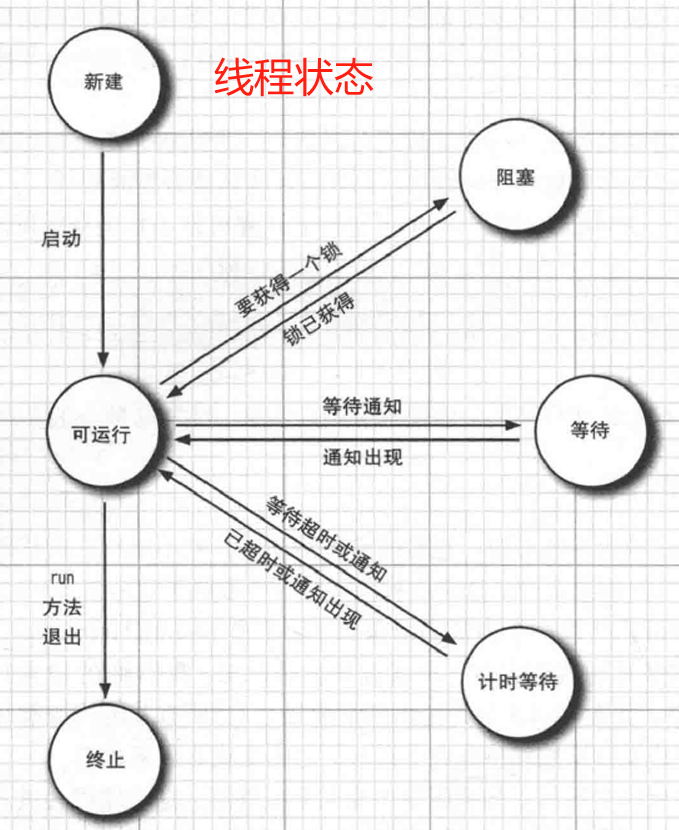
Thread类更推荐的方式,可以通过实现Runnable接口并将其传递给Thread构造函数来创建线程。线程状态:
新建(New)
可运行(Runnable)(就绪)
阻塞(Blocked)
等待 (Waiting)
计时等待(Timed waiting)
终止(Terminated)

继承 Thread 类
class MyThread extends Thread
{
    @Override
    public void run()
    {
        System.out.println("Thread is running...");
    }
}

public class ThreadExample
{
    public static void main(String[] args)
    {
        MyThread thread = new MyThread();
        thread.start(); // 启动线程
    }
}
实现 Runnable 接口
class MyRunnable implements Runnable
{
@Override
public void run()
{
System.out.println("Runnable is running...");
}
}
public class RunnableExample
{
public static void main(String[] args)
{
MyRunnable myRunnable = new MyRunnable();
Thread thread = new Thread(myRunnable);
thread.start(); // 启动线程
}
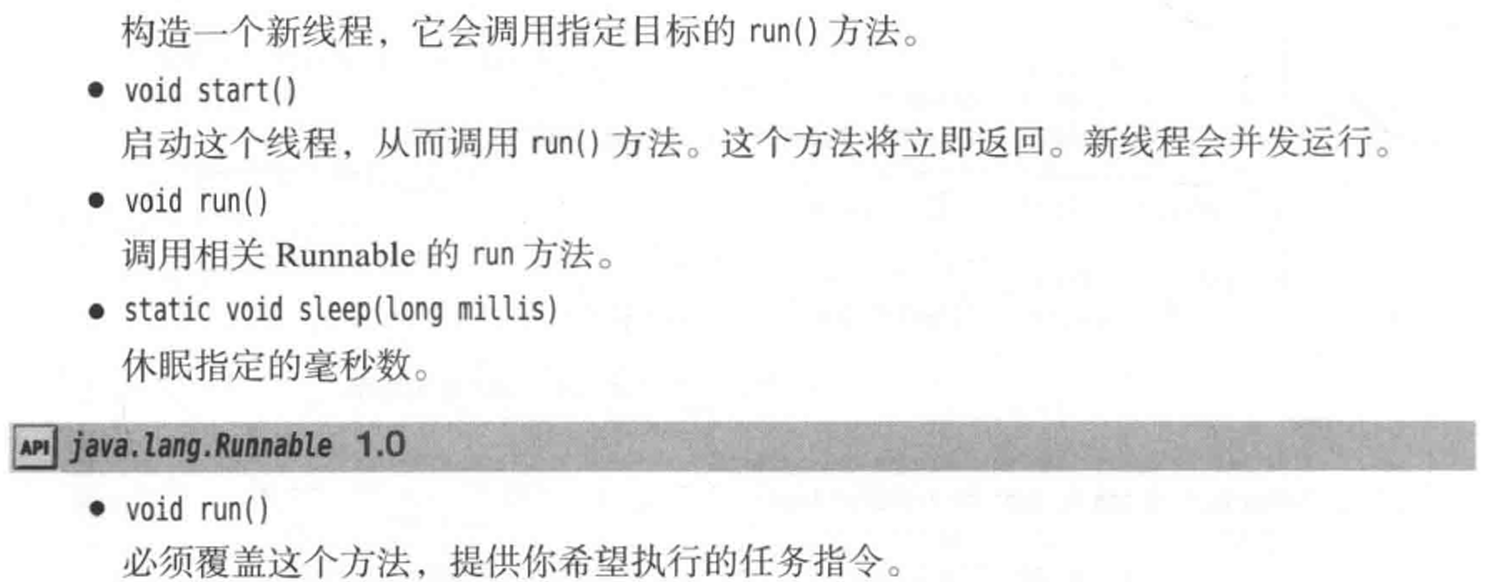
}②新建线程
当用new操作符创建一个新线程时,如new Thread(r),此时线程还没有开始运行(run也没执行),线程处于新建状态。
③可运行线程(就绪)
一旦调用start方法,线程就处于可运行状态。一个可运行的线程可能正在运行也可能没有运行。

④阻塞和等待线程
当线程处于阻塞或在等待状态时,它暂时是不活动的。
Thred.sleep和计时版的Object.wait、Thread.join、Lock.tryLock、Condition.await。
⑤终止线程
原因:
由于run方法正常退出,线程自然终止。
因为一个没有捕获的异常终止了run方法,使线程意外终止。


⑥中断线程
中断线程是通过
Thread类的interrupt()方法来实现的。中断并不直接终止线程,而是通过设置线程的中断标志来通知线程进行适当的处理。线程是否响应中断,取决于线程中的代码逻辑,尤其是如何处理中断信号。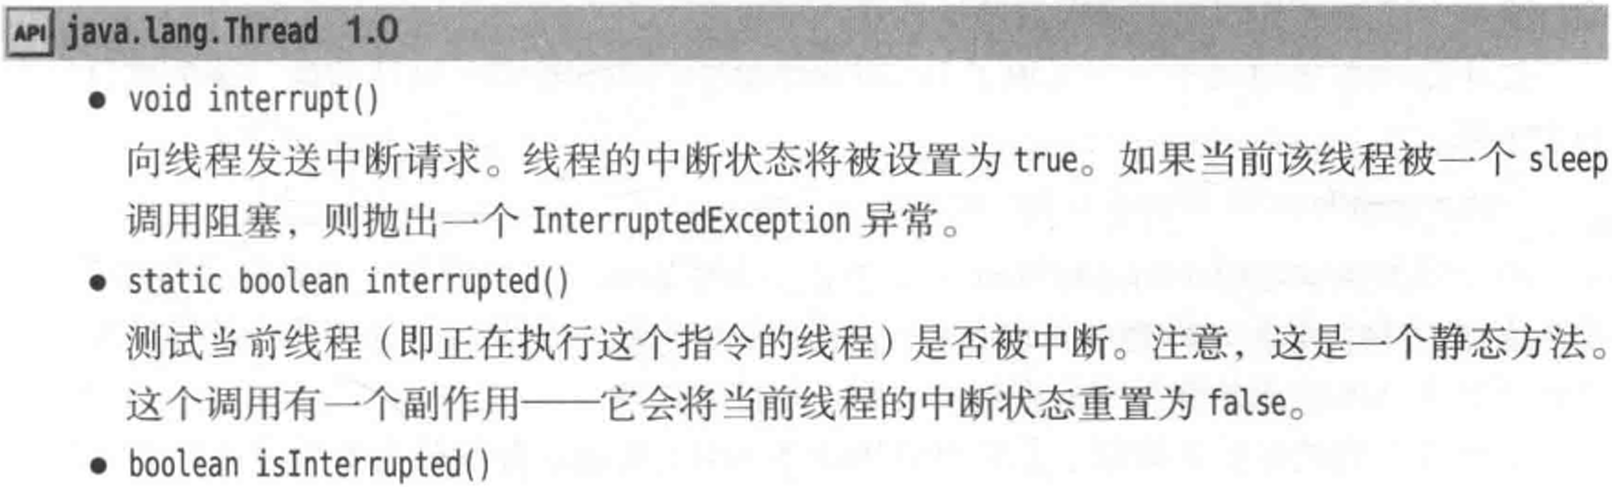

class MyThread extends Thread
{
    @Override
    public void run()
    {
        try
        {
            for (int i = 0; i < 10; i++)
            {
                if (Thread.interrupted())
                {
                    System.out.println("Thread was interrupted");
                    break;
                }
                System.out.println("Running " + i);
                Thread.sleep(1000);  // 模拟任务
            }
        } catch (InterruptedException e)
        {
            System.out.println("Thread was interrupted during sleep");
        }
    }
}

public class InterruptExample
{
    public static void main(String[] args) throws InterruptedException
    {
        MyThread thread = new MyThread();
        thread.start();

        // 主线程睡眠2秒后中断子线程
        Thread.sleep(2000);
        thread.interrupt();
    }
}
⑦守护线程

⑧线程名
在 Java 中,每个线程都可以有一个名称,用于标识线程。线程名称可以帮助我们在调试和日志记录时更方便地识别不同的线程。线程的名称可以在创建时指定,也可以在运行时修改。
当一个线程被创建时,如果没有指定线程名称,Java 会为其分配一个默认的名称。默认名称通常是:主线程:
main、其他线程:Thread-N(其中N是线程的编号,从 0 开始)。可以在创建线程时通过
Thread类的构造函数指定线程名,或者在线程运行时通过setName()方法来修改线程名称。
创建时指定线程名
class MyThread extends Thread
{
    @Override
    public void run()
    {
        System.out.println("Thread name: " + getName());
    }
}

public class ThreadNameExample
{
    public static void main(String[] args)
    {
        MyThread thread1 = new MyThread();
        thread1.setName("WorkerThread1");  // 设置线程名称
        thread1.start();

        MyThread thread2 = new MyThread();
        thread2.setName("WorkerThread2");
        thread2.start();
    }
}
*****
class MyRunnable implements Runnable
{
    @Override
    public void run()
    {
        System.out.println(Thread.currentThread().getName() + " is executing the task");
    }
}

public class ThreadNameExample
{
    public static void main(String[] args)
    {
        Runnable task = new MyRunnable();

        // 通过构造函数指定线程名
        Thread thread1 = new Thread(task, "WorkerThread-1");
        thread1.start();

        Thread thread2 = new Thread(task, "WorkerThread-2");
        thread2.start();
    }
}
运行时修改线程名
class MyThread extends Thread
{
@Override
public void run()
{
System.out.println("Thread name: " + getName());
}
}
public class ThreadNameExample
{
public static void main(String[] args)
{
MyThread thread = new MyThread();
thread.start();
// 修改线程名称
thread.setName("ModifiedThread");
System.out.println("Thread name after modification: " + thread.getName());
}
}⑨未捕获异常的处理器
线程的run方法不能抛出任何检查型异常,但是非检查型异常可能会导致线程终止。
对于可以传播的异常(非检查异常),并没有任何catch子句。在线程死亡之前,异常会传递到一个用于处理未捕获异常的处理器。
未捕获异常的处理是通过
Thread.UncaughtExceptionHandler接口来实现的。UncaughtExceptionHandler允许开发者定义一个处理未捕获异常的回调方法,从而在异常没有被捕获时进行相应的处理,比如打印日志、发送通知等。处理器必须是一个实现上述接口的类。Thread.UncaughtExceptionHandler是一个接口,它只有一个方法:public void uncaughtException(Thread t, Throwable e);t:抛出异常的线程。e:抛出的异常。要为某个线程或所有线程设置未捕获异常处理器,必须实现
UncaughtExceptionHandler接口,并通过Thread.setUncaughtExceptionHandler()方法来设置。可以通过
Thread.setDefaultUncaughtExceptionHandler()为所有线程设置一个默认的处理器。当任何线程未捕获异常时,都会使用这个处理器。若没安装默认处理器,则默认处理器为null。若没有为单个线程安装处理器,那么处理器为该线程的ThreadGroup对象。


为单个线程设置未捕获异常处理器
class MyThread extends Thread
{
@Override
public void run()
{
// 故意抛出一个异常,未捕获
int result = 10 / 0; // 这会抛出 ArithmeticException
}
}
public class UncaughtExceptionHandlerExample
{
public static void main(String[] args)
{
// 创建一个线程
MyThread thread = new MyThread();
// 为该线程设置 UncaughtExceptionHandler
thread.setUncaughtExceptionHandler(new Thread.UncaughtExceptionHandler()
{
@Override
public void uncaughtException(Thread t, Throwable e)
{
System.out.println("Caught an exception in thread: " + t.getName());
System.out.println("Exception: " + e);
}
});
// 启动线程
thread.start();
}
}
*****
为所有线程设置未捕获异常处理器
public class UncaughtExceptionHandlerExample
{
public static void main(String[] args)
{
// 设置全局的未捕获异常处理器
Thread.setDefaultUncaughtExceptionHandler(new Thread.UncaughtExceptionHandler()
{
@Override
public void uncaughtException(Thread t, Throwable e)
{
System.out.println("Global handler caught an exception in thread: " + t.getName());
System.out.println("Exception: " + e);
}
});
// 创建并启动多个线程
new Thread(() ->
{
int result = 10 / 0; // 故意抛出 ArithmeticException
}).start();
new Thread(() ->
{
String str = null;
str.length(); // 故意抛出 NullPointerException
}).start();
}
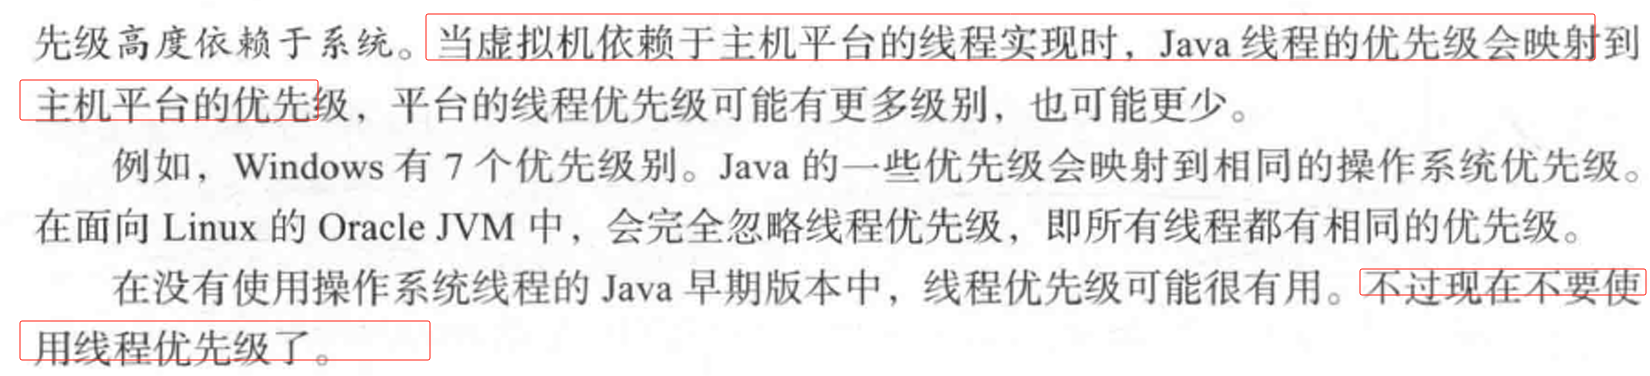
}⑩线程优先级


3. 任务和线程池
①介绍
线程池:是一个用于管理和复用线程的机制,特别适用于需要处理大量短小任务的应用程序。线程池的核心思想是将任务提交给池中的线程,由池中的线程来执行,而不是每次都创建新线程。这样可以减少频繁创建和销毁线程带来的性能开销,提高系统的响应速度和资源利用率。当有任务需要执行时,线程池中的线程就会去执行该任务;如果池中的线程都在工作,那么新的任务会被暂时保存在队列中,等待线程空闲后再执行。
在 Java 中,线程池由
java.util.concurrent包提供,主要通过Executor和ExecutorService(是前一个子接口,提供更多服务)接口来管理。最常用的线程池实现是ThreadPoolExecutor,和ScheduledThreadPoolExecutor而Executors类提供了线程池的工厂方法来简化线程池的创建。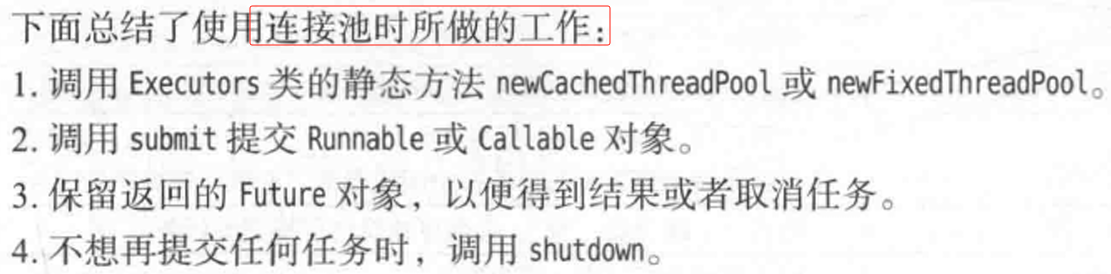
Future是一个接口,用于表示异步计算的结果。Callable是一个可以返回结果的任务,它与Runnable类似,但与Runnable不同的是,它能够返回结果并抛出异常。通过ExecutorService.submit()提交的任务会返回一个Future对象,程序可以使用该对象来获取任务的执行结果。在 Java 中,
Future和Callable是用于执行并发任务并获取结果的工具。它们通常与ExecutorService配合使用,允许我们以异步方式执行任务并获取执行结果。相比传统的Thread类,ExecutorService提供了更强大、更灵活的线程管理功能,而Future和Callable更好地处理任务的结果和异常。
②线程池核心组件
任务队列:用于存放等待执行的任务。
工作线程:池中的线程,负责从队列中获取任务并执行。
线程池大小:线程池中维护的线程数量,分为核心线程数和最大线程数。
③线程池的创建
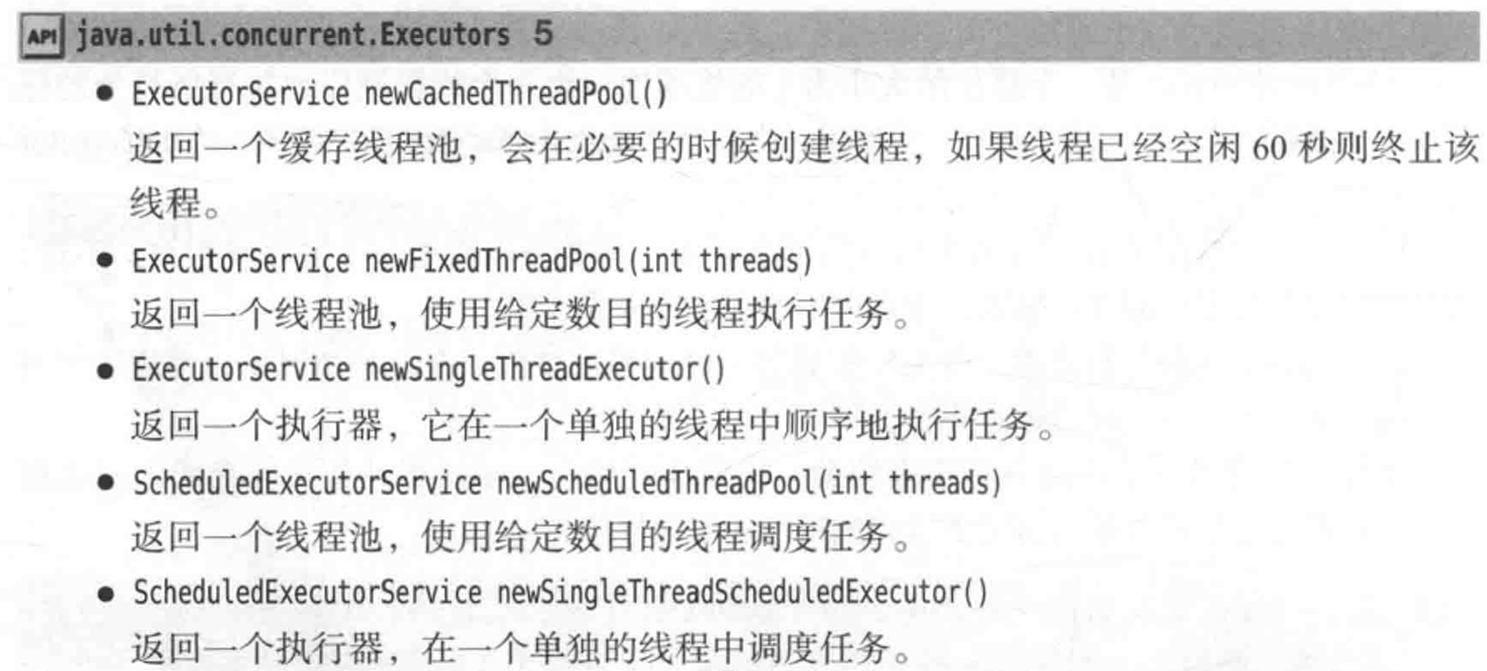
可以通过
Executors类提供的静态方法来创建线程池,这些方法封装了常见的线程池创建模式。常见的线程池类型有: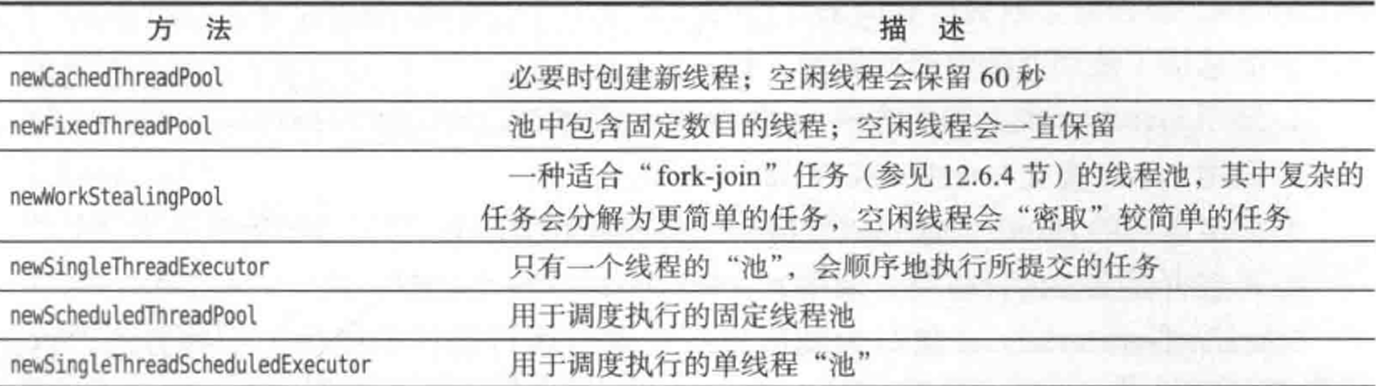
固定大小线程池(newFixedThreadPool())
该线程池维护一个固定大小的线程池,如果线程池中的线程处于空闲状态,
则可以处理提交的任务。任务会被保存在任务队列中,直到有线程可用。
public class FixedThreadPoolExample
{
    public static void main(String[] args)
    {
        ExecutorService executor = Executors.newFixedThreadPool(3); // 创建一个包含 3 个线程的线程池

        Runnable task = () ->
        {
            System.out.println(Thread.currentThread().getName() + " is executing the task.");
        };

        for (int i = 0; i < 5; i++)
        {
            executor.submit(task); // 提交任务
        }

        executor.shutdown(); // 关闭线程池
    }
}
缓存线程池(newCachedThreadPool())
该线程池可根据需要创建新的线程,如果线程池中的线程在一定时间内空闲,
则会被终止。适用于执行很多短期异步任务的场景。
public class CachedThreadPoolExample
{
public static void main(String[] args)
{
ExecutorService executor = Executors.newCachedThreadPool(); // 创建一个缓存线程池
Runnable task = () ->
{
System.out.println(Thread.currentThread().getName() + " is executing the task.");
};
for (int i = 0; i < 5; i++)
{
executor.submit(task); // 提交任务
}
executor.shutdown(); // 关闭线程池
}
}单线程池(newSingleThreadExecutor())
该线程池保证所有任务按顺序执行,且只有一个工作线程。
适用于只需要一个线程顺序执行任务的场景。
public class SingleThreadExecutorExample
{
public static void main(String[] args)
{
ExecutorService executor = Executors.newSingleThreadExecutor(); // 创建一个单线程池
Runnable task = () ->
{
System.out.println(Thread.currentThread().getName() + " is executing the task.");
};
for (int i = 0; i < 5; i++)
{
executor.submit(task); // 提交任务
}
executor.shutdown(); // 关闭线程池
}
}定时线程池(newScheduledThreadPool())
该线程池用于定时或周期性地执行任务。它适用于调度任务的场景,例如定时任务和周期性任务。
public class ScheduledThreadPoolExample
{
public static void main(String[] args)
{
ScheduledExecutorService executor = Executors.newScheduledThreadPool(3); // 创建一个定时线程池
Runnable task = () ->
{
System.out.println(Thread.currentThread().getName() + " is executing the task.");
};
executor.scheduleAtFixedRate(task, 1, 2, TimeUnit.SECONDS); // 每 1 秒执行一次任务,并且任务间隔为 2 秒
// Shutdown the executor after some time
try
{
Thread.sleep(10000); // 让任务执行 10 秒
} catch (InterruptedException e)
{
e.printStackTrace();
}
executor.shutdown(); // 关闭线程池
}
}④线程池的核心参数
ThreadPoolExecutor是 Java 中最常用的线程池实现类,它提供了更灵活的配置和管理机制。ThreadPoolExecutor构造函数中有多个重要的参数:corePoolSize:核心线程池的大小,即线程池保持的最小线程数。
maximumPoolSize:线程池允许的最大线程数。
keepAliveTime:线程池中空闲线程的存活时间。超过这个时间没有任务要处理时,线程会被终止。
TimeUnit:
keepAliveTime参数的时间单位。workQueue:用于存储等待执行任务的队列。常见的队列有:
LinkedBlockingQueue、ArrayBlockingQueue、SynchronousQueue等。threadFactory:用于创建新线程的工厂,允许自定义线程的名称、优先级等。
rejectedExecutionHandler:用于处理无法执行的任务的策略。常见的拒绝策略有:
AbortPolicy、CallerRunsPolicy、DiscardPolicy、DiscardOldestPolicy。
public class CustomThreadPoolExample
{
    public static void main(String[] args)
    {
        // 创建一个自定义的线程池
        ExecutorService executor = new ThreadPoolExecutor(
                2, // 核心线程数
                4, // 最大线程数
                10, // 空闲线程存活时间
                TimeUnit.SECONDS, // 时间单位
                new LinkedBlockingQueue<>(10), // 等待队列
                Executors.defaultThreadFactory(), // 线程工厂
                new ThreadPoolExecutor.CallerRunsPolicy() // 拒绝策略
        );

        Runnable task = () ->
        {
            System.out.println(Thread.currentThread().getName() + " is executing the task.");
        };

        for (int i = 0; i < 15; i++)
        {
            executor.submit(task); // 提交任务
        }

        executor.shutdown(); // 关闭线程池
    }
}
⑤线程池的生命周期管理
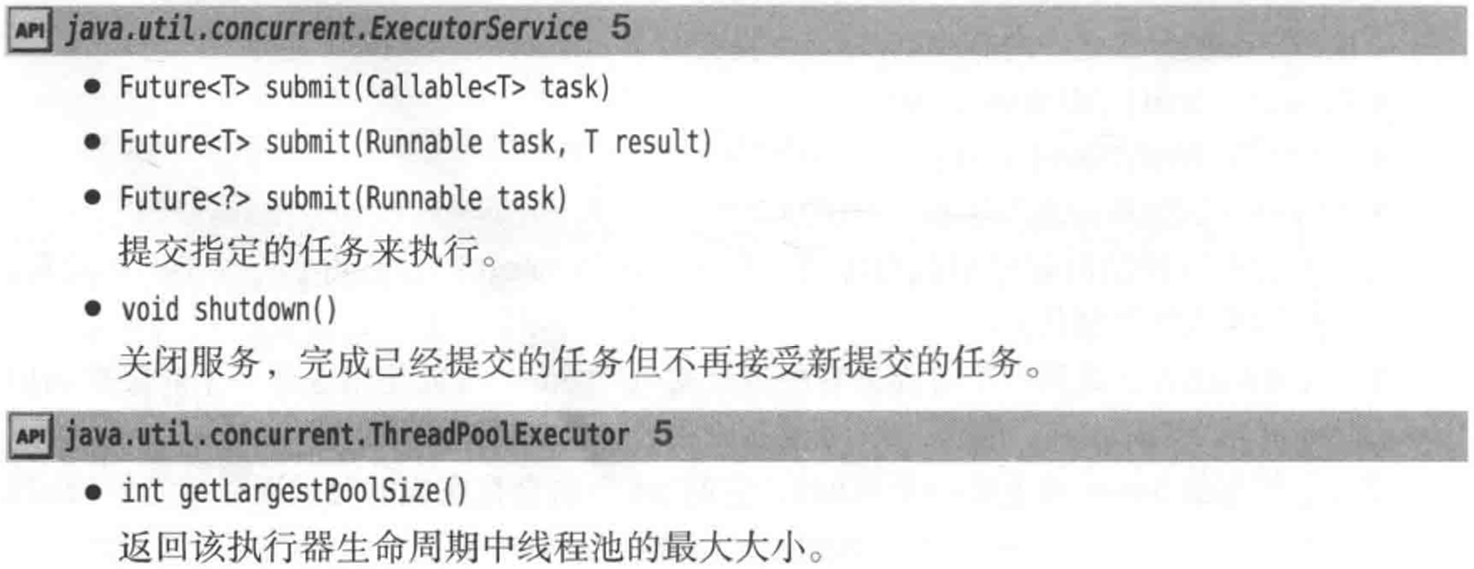
线程池通常在不再需要时进行关闭,以释放资源。关闭线程池可以使用
shutdown()或shutdownNow()方法。shutdown():优雅关闭,线程池不再接受新任务,但会执行已经提交的任务。shutdownNow():立即关闭,尝试停止所有正在执行的任务并返回待执行的任务。
⑥API

⑦Future接口
Future接口Future是一个接口,代表一个异步执行任务的结果。它允许你获取任务执行的结果,检查任务是否完成,或取消任务。你通常通过ExecutorService.submit()提交一个任务,并获得一个Future对象来操作该任务。主要方法:
get():获取任务的结果。如果任务没有完成,get()会阻塞直到任务完成。如果任务执行时抛出异常,get()会抛出异常。get(long timeout, TimeUnit unit):在指定的时间内获取任务的结果,如果超时仍未完成,抛出TimeoutException。cancel(boolean mayInterruptIfRunning):尝试取消任务。如果任务已开始执行并且可以中断,设置mayInterruptIfRunning为true使其被中断。isCancelled():检查任务是否被取消。isDone():检查任务是否已经完成。
public class FutureExample
{
    public static void main(String[] args)
    {
        // 创建一个线程池
        ExecutorService executor = Executors.newSingleThreadExecutor();

        // 提交一个返回结果的 Callable 任务
        Future<Integer> future = executor.submit(() ->
        {
            System.out.println("Task is running...");
            Thread.sleep(2000);  // 模拟耗时操作
            return 42;  // 返回结果
        });

        try
        {
            // 获取任务的执行结果,阻塞直到任务完成
            Integer result = future.get();
            System.out.println("Task result: " + result);
        } catch (InterruptedException | ExecutionException e)
        {
            e.printStackTrace();
        } finally
        {
            executor.shutdown();
        }
    }
}
⑧Callable接口
Callable接口Callable接口与Runnable类似,但与Runnable不同的是,Callable可以返回一个结果,并且可以抛出异常。Callable是在并发编程中获取任务返回值的核心接口。主要方法:
V call():执行任务的入口方法,返回任务的计算结果,可以抛出异常。Callable的设计目的主要是为了解决Runnable接口不能返回值和抛出异常的问题。Runnable只能执行任务,并不能返回结果,而Callable可以通过ExecutorService.submit()提交,并由Future获取返回结果。
public class CallableExample
{
    public static void main(String[] args)
    {
        // 创建一个线程池
        ExecutorService executor = Executors.newCachedThreadPool();

        // 提交一个返回结果的 Callable 任务
        Callable<Integer> task = () ->
        {
            System.out.println("Task is running...");
            Thread.sleep(2000);  // 模拟耗时操作
            return 42;  // 返回结果
        };

        // 提交任务并获得 Future 对象
        Future<Integer> future = executor.submit(task);

        try
        {
            // 获取任务的执行结果,阻塞直到任务完成
            Integer result = future.get();
            System.out.println("Task result: " + result);
        } catch (InterruptedException | ExecutionException e)
        {
            e.printStackTrace();
        } finally
        {
            executor.shutdown();
        }
    }
}
⑨FutureTask
FutureTask是 Java 中表示异步执行任务的一个类。它实现了Runnable和Future接口,允许你在独立的线程中执行任务并获取计算结果。通常与线程池或执行器一起使用。FutureTask的关键方法:run():执行任务的方法,通常在任务被提交到执行器时调用。
get():获取任务的执行结果。如果任务还未完成,则会阻塞当前线程,直到任务完成。
cancel():尝试取消任务的执行。如果任务还没有开始执行或者已经完成,则取消失败。
isDone():检查任务是否完成,无论是正常完成还是因为取消而完成。
isCancelled():检查任务是否被取消。
public class FutureTaskExample
{
public static void main(String[] args) throws Exception
{
// 创建一个 Callable 任务
Callable<Integer> callableTask = new Callable<Integer>()
{
@Override
public Integer call() throws Exception
{
Thread.sleep(2000); // 模拟长时间任务
return 123; // 返回结果
}
};
// 创建 FutureTask 实例
FutureTask<Integer> futureTask = new FutureTask<>(callableTask);
// 启动线程执行任务
Thread thread = new Thread(futureTask);
thread.start();
// 获取任务执行结果
System.out.println("Task result: " + futureTask.get()); // 这里会阻塞直到任务完成
}
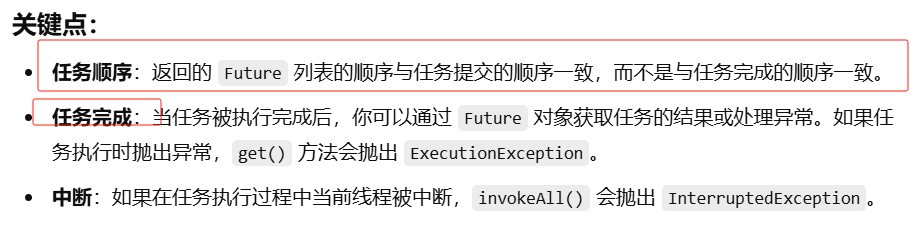
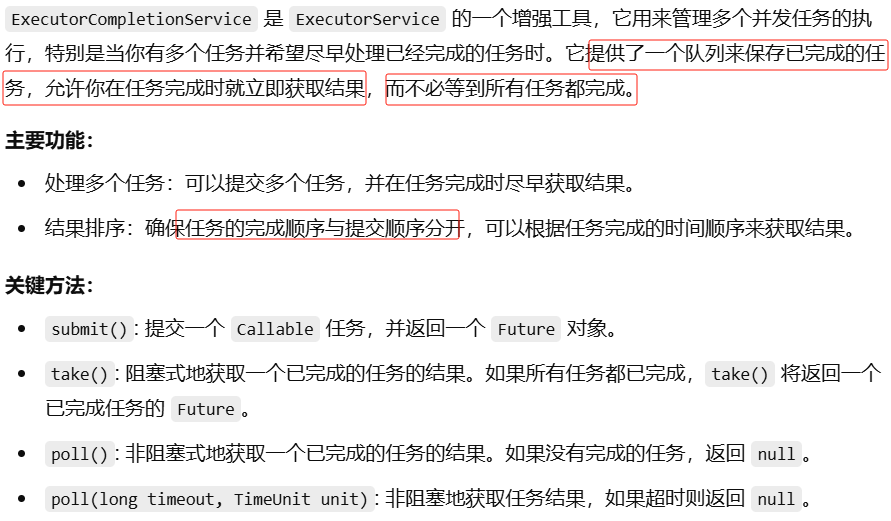
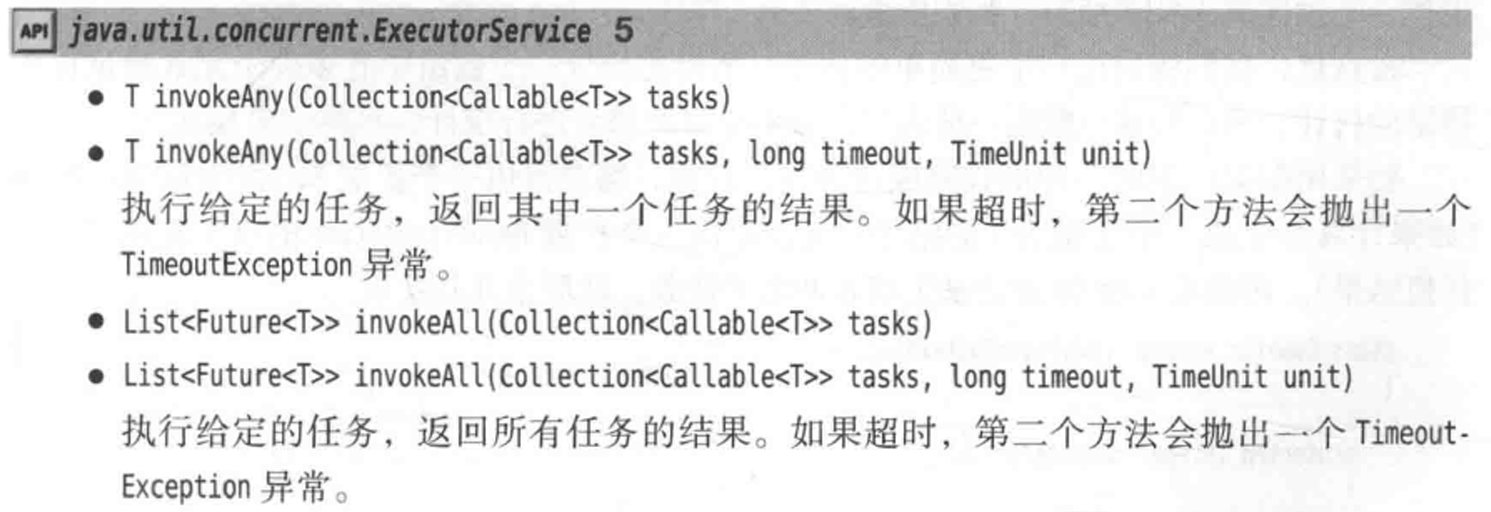
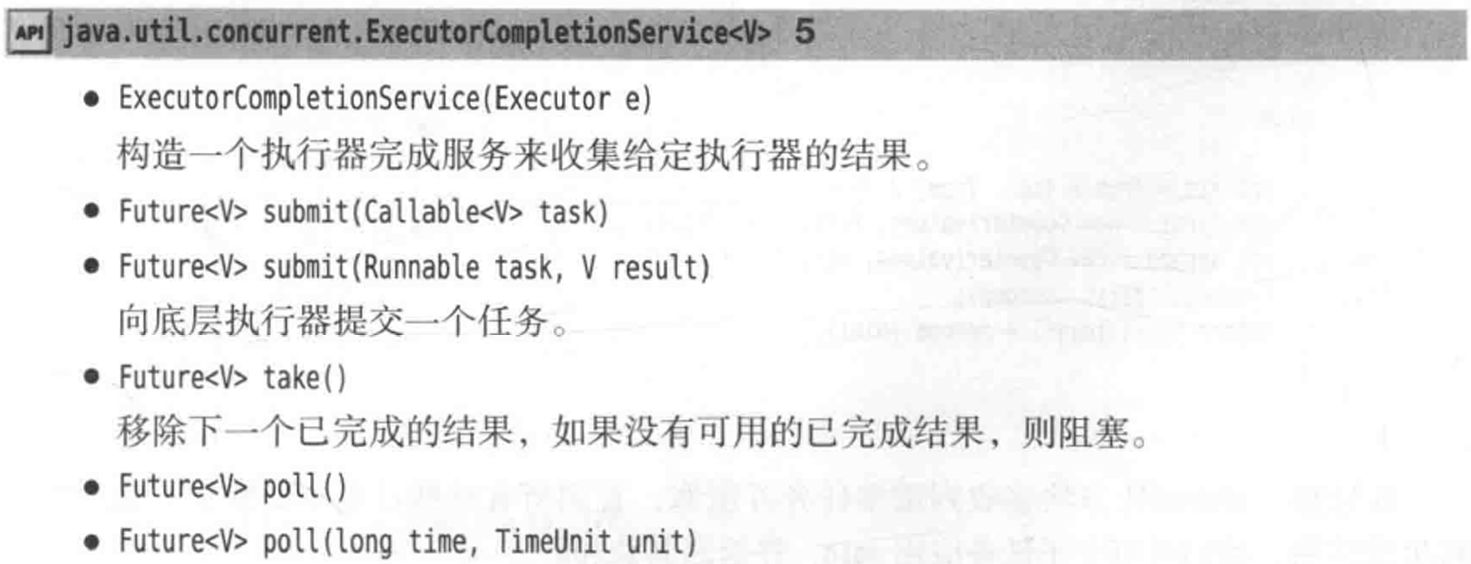
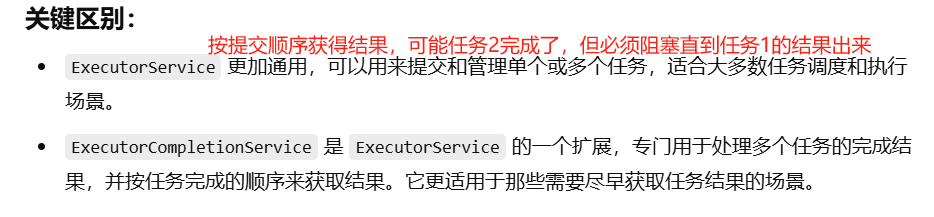
}⑩控制任务组


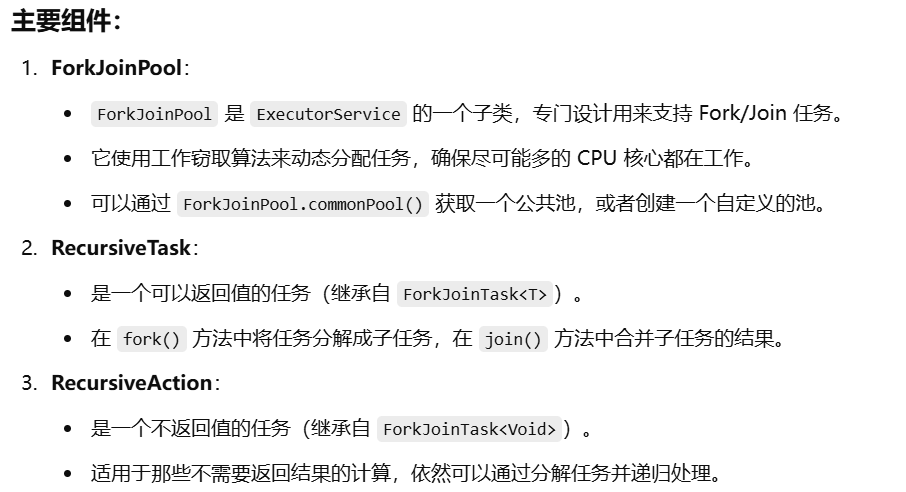
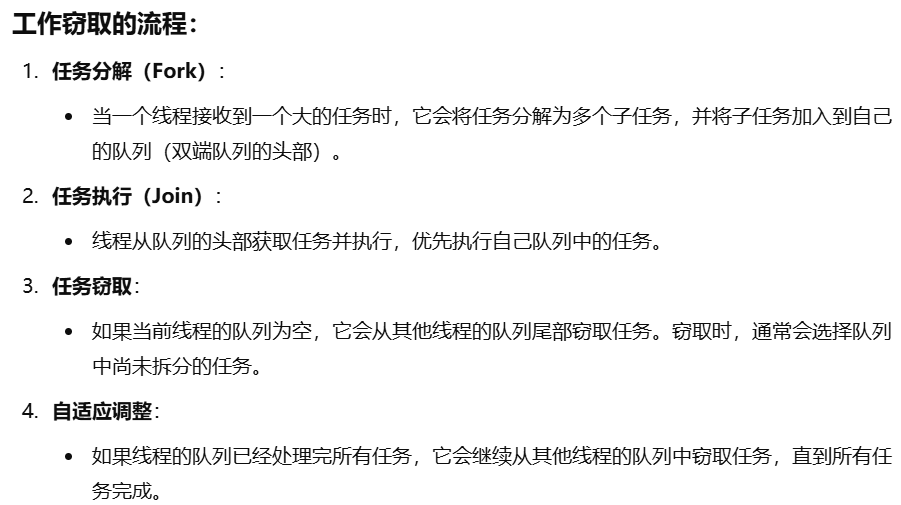
①①Fork/Join框架
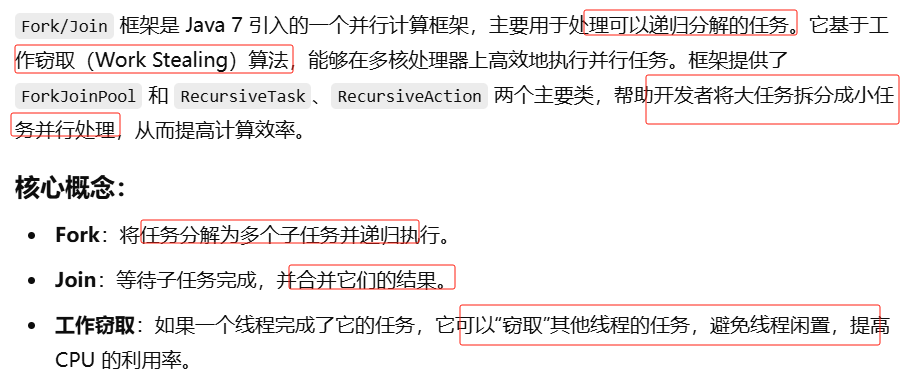

4. 同步
①介绍
在 Java 中,同步是指在多线程环境下控制对共享资源的访问,以避免多个线程同时操作共享资源导致数据不一致或程序异常。同步机制通过确保一次只有一个线程能访问某一代码块或资源,从而避免并发问题。Java 提供了多种同步方法来保证线程安全。
②常见问题
竞态条件(Race Condition):多线程竞争共享资源,导致数据的不一致性。通过同步可以避免竞态条件。
死锁(Deadlock):多个线程因相互等待资源而无法继续执行。通过避免嵌套锁或使用
tryLock()可以避免死锁。资源饥饿(Starvation):某些线程一直无法获得资源,导致无法执行。通过公平锁或合理调度线程优先级来避免饥饿。
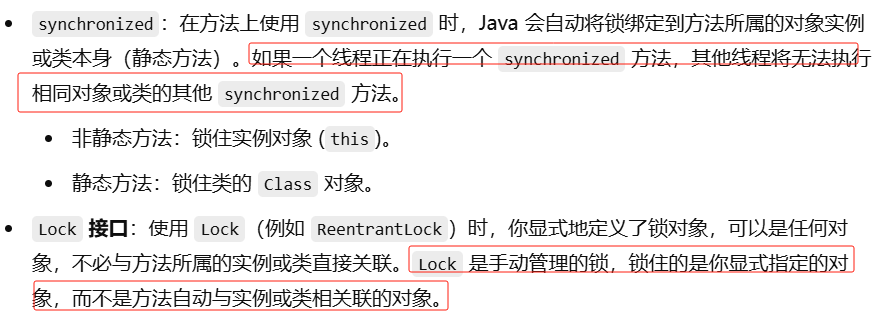
③synchronized 关键字
synchronized是 Java 提供的最常用同步机制,用来保证同一时刻只有一个线程能够访问某个资源或代码块。Java中每个对象都有一个内部锁。


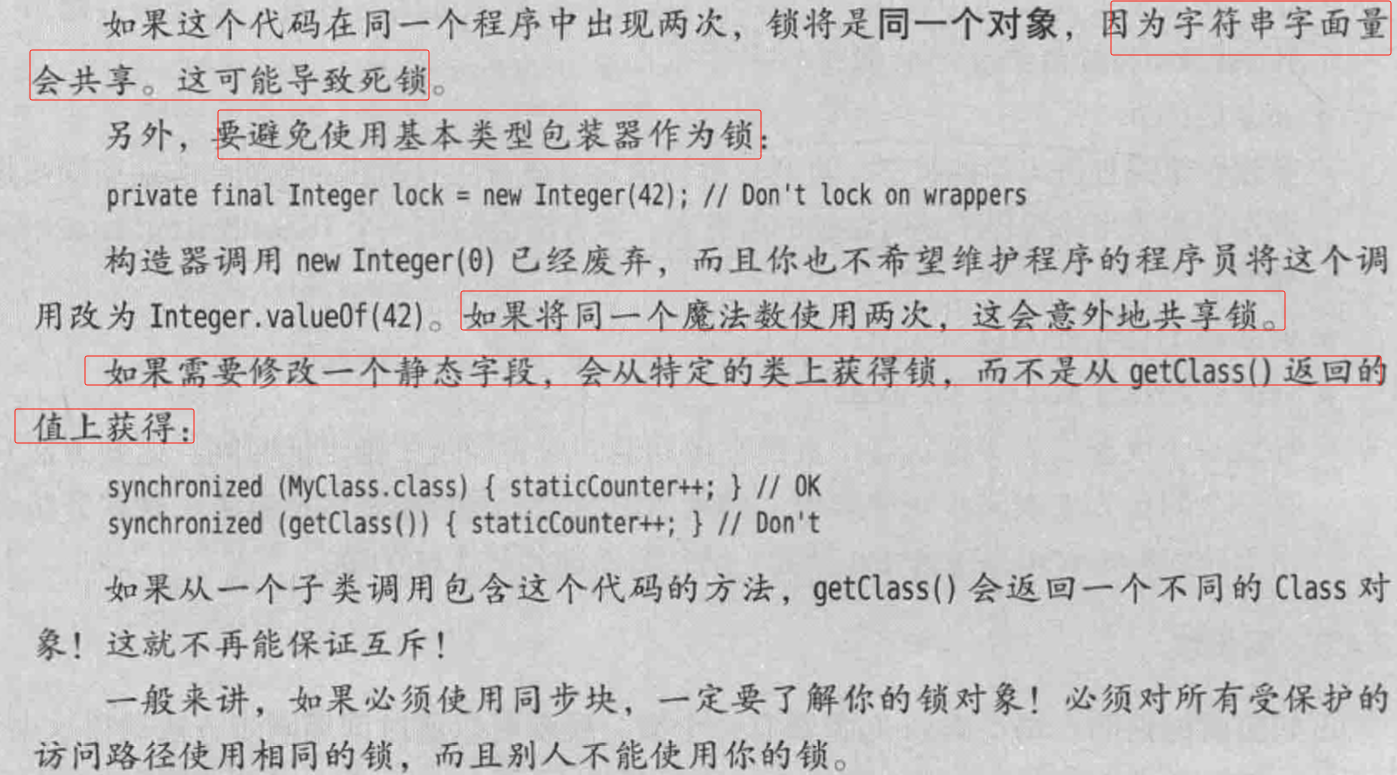
方式:同步方法、同步代码块、锁住类对象
同步方法
将整个方法声明为 synchronized,它会锁住当前对象
(对于实例方法)或类对象(对于静态方法),从而避免其他线程同时访问。

实例方法的同步:锁住当前实例对象。
public synchronized void increment() {
    count++;  // 线程安全的增加操作
}
****
静态方法的同步:锁住类对象,即 Class 对象。
public static synchronized void increment() {
    count++;  // 线程安全的增加操作
}
同步代码块
同步代码块(synchronized 块)不会锁住整个实例或类,而是锁住代码块中指定的对象
synchronized 还可以用来修饰方法中的一部分代码块,锁住指定的对象。
这样可以避免锁住整个方法,提高程序的效率。
public void increment() {
synchronized (this) { // 锁住当前实例对象
count++;
}
}④Lock接口和条件对象
Lock是 Java 中更为灵活的同步机制,位于java.util.concurrent.locks包中。Lock提供了比synchronized更加细粒度的控制,例如可中断的锁、尝试锁等。ReentrantLock是Lock接口的常见实现类,它提供了比synchronized更强大的功能,例如显式锁、可中断的锁、定时锁等。它是可重入的,意味着同一个线程可以多次获取锁而不会发生死锁。
使用 Lock 来同步
public class Counter
{
    private int count = 0;
    private final Lock lock = new ReentrantLock();

    public void increment()
    {
        lock.lock();  // 获取锁
        try
        {
            count++;  // 线程安全的增加操作
        } finally
        {
            lock.unlock();  // 释放锁
        }
    }
}
尝试获取锁(tryLock())
tryLock() 方法允许线程尝试获得锁,如果锁已被其他线程持有,它不会阻塞,而是直接返回。
public class Counter
{
private int count = 0;
private final Lock lock = new ReentrantLock();
public void increment()
{
if (lock.tryLock())
{ // 尝试获取锁
try
{
count++;
} finally
{
lock.unlock();
}
} else
{
System.out.println("Could not acquire lock");
}
}
}条件对象是 Java 中用于线程间通信的机制,主要通过Condition接口实现。它是与Lock一起使用的,提供了比synchronized和Object类的wait()/notify()更强大和灵活的线程协调能力。与
Lock配合使用:Condition必须由Lock(如ReentrantLock)对象创建,不能独立使用。多条件队列支持:一个
Lock可以创建多个Condition对象,从而支持多个等待队列。await():让线程等待,释放锁,并进入该条件的等待队列。signal():唤醒等待该条件的某个线程。哪个被唤醒的线程会重新进入该对象,若锁可用则得到锁,并从之前暂停的地方继续执行。signalAll():唤醒所有等待该条件的线程。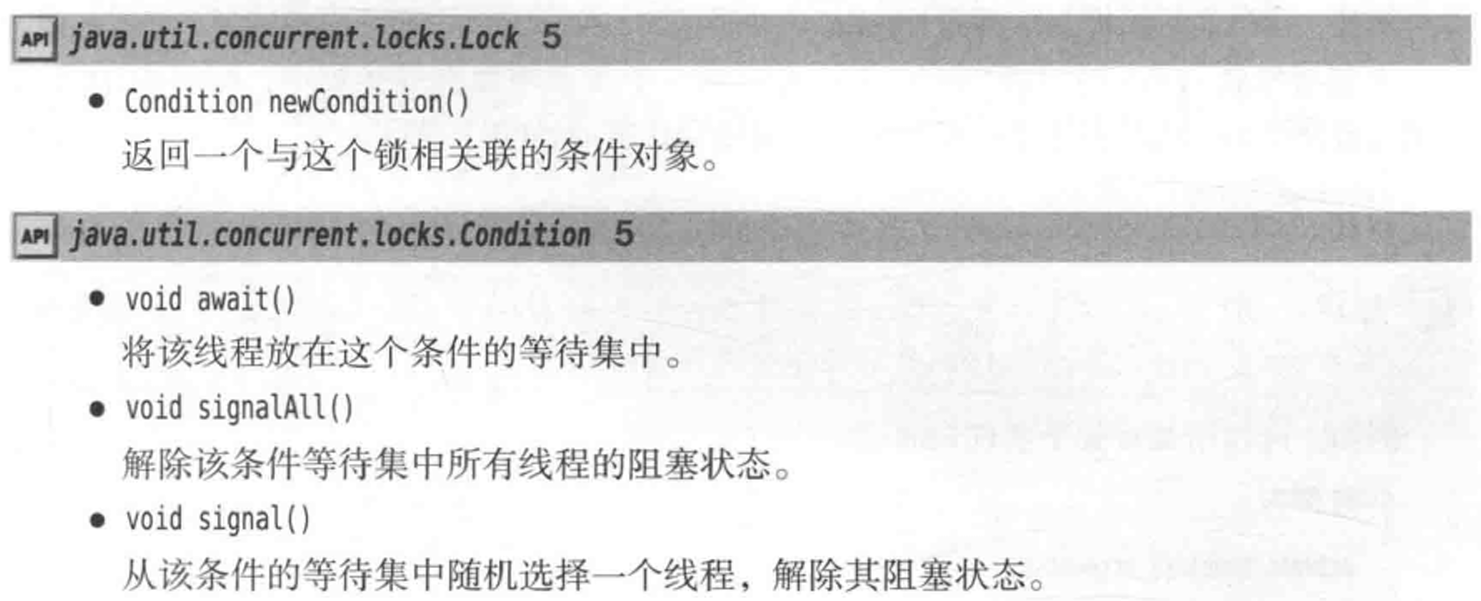
import java.util.concurrent.locks.Condition;
import java.util.concurrent.locks.Lock;
import java.util.concurrent.locks.ReentrantLock;

public class ConditionExample
{

    public static void main(String[] args)
    {
        Buffer buffer = new Buffer();

        // 创建生产者线程
        Thread producer = new Thread(() ->
        {
            for (int i = 0; i < 10; i++)
            {
                try
                {
                    buffer.put(i);
                    Thread.sleep(500); // 模拟生产时间
                } catch (InterruptedException e)
                {
                    e.printStackTrace();
                }
            }
        });

        // 创建消费者线程
        Thread consumer = new Thread(() ->
        {
            for (int i = 0; i < 10; i++)
            {
                try
                {
                    buffer.get();
                    Thread.sleep(1000); // 模拟消费时间
                } catch (InterruptedException e)
                {
                    e.printStackTrace();
                }
            }
        });

        producer.start();
        consumer.start();
    }
}

class Buffer
{
    private int data;
    private boolean available = false; // 标记缓冲区是否有数据(是否已满)
    private final Lock lock = new ReentrantLock();
    private final Condition notEmpty = lock.newCondition();
    private final Condition notFull = lock.newCondition();

    // 生产数据
    public void put(int value) throws InterruptedException
    {
        lock.lock(); // 获取锁
        try
        {
            while (available)
            { // 如果缓冲区已满,等待
                notFull.await();//释放锁
            }
            data = value;
            available = true;
            System.out.println("Produced: " + value);
            notEmpty.signal(); // 通知消费者缓冲区不为空
        } finally
        {
            lock.unlock(); // 释放锁
        }
    }

    // 消费数据
    public void get() throws InterruptedException
    {
        lock.lock(); // 获取锁
        try
        {
            while (!available)
            { // 如果缓冲区为空,等待
                notEmpty.await();
            }
            System.out.println("Consumed: " + data);
            available = false;
            notFull.signal(); // 通知生产者缓冲区不满
        } finally
        {
            lock.unlock(); // 释放锁
        }
    }
}
⑤ReadWriteLock 接口
ReadWriteLock是一种特殊的锁机制,它为读操作和写操作提供了不同的锁。读操作是共享的,即多个线程可以同时读取,但写操作是独占的,只有一个线程可以写入。ReadWriteLock包含两个锁:readLock():用于读操作。writeLock():用于写操作。
import java.util.concurrent.locks.ReadWriteLock;
import java.util.concurrent.locks.ReentrantReadWriteLock;

public class ReadWriteExample
{
    private final ReadWriteLock lock = new ReentrantReadWriteLock();
    private int count = 0;

    public void read()
    {
        lock.readLock().lock();
        try
        {
            System.out.println("Reading: " + count);
        } finally
        {
            lock.readLock().unlock();
        }
    }

    public void write(int value)
    {
        lock.writeLock().lock();
        try
        {
            count = value;
            System.out.println("Writing: " + count);
        } finally
        {
            lock.writeLock().unlock();
        }
    }
}
⑥volatile
volatile是 Java 中的一种轻量级同步机制,用于保证多线程环境下变量的可见性。它被用来修饰实例变量或类变量,确保该变量在多个线程之间的变化是可见的,防止线程之间的缓存不一致问题。volatile关键字告诉 Java 虚拟机(JVM)和线程:可见性:当一个线程修改了被
volatile修饰的变量的值,其他线程可以立即看到这个修改的值。即当一个线程更新该变量时,其他线程会从主内存中重新读取它,而不是从线程自己的工作内存(CPU 缓存或寄存器)中读取。禁止指令重排序:
volatile保证对该变量的写操作不会与其他操作重排序,防止编译器和 CPU 执行指令优化时造成不可预测的结果。虽然
volatile可以确保可见性和禁止指令重排序,但它 不保证原子性。换句话说,对于复合操作(如i++),volatile并不能保证线程安全,因为这些操作涉及多个步骤(读取、计算、写回),多个线程同时访问时仍然可能出现问题。工作原理:在 Java 中,每个线程都有自己的工作内存(也叫做 CPU 缓存)。当一个线程修改了变量的值时,这个修改首先会写入到该线程的工作内存中。其他线程如果要读取该变量时,可能会从自己的工作内存中获取一个过时的值。
volatile确保:线程写入的值会立即刷新到主内存中,而其他线程也能立即看到这个更新。
线程从主内存读取变量时会获取最新的值,而不会使用自己的缓存。
public class VolatileExample
{
    private volatile boolean flag = false; // volatile 修饰变量

    public void toggleFlag()
    {
        flag = !flag; // 改变变量的值
    }

    public void printFlag()
    {
        while (!flag)
        {  // 在其他线程中检查变量
            System.out.println("Flag is still false.");
        }
        System.out.println("Flag is now true.");
    }

    public static void main(String[] args) throws InterruptedException
    {
        VolatileExample example = new VolatileExample();

        Thread t1 = new Thread(example::printFlag);
        Thread t2 = new Thread(example::toggleFlag);

        t1.start();
        Thread.sleep(100);  // 确保 t1 先执行
        t2.start();
    }
}
⑦final变量
当字段声明为final时,多个线程可以安全的读取一个字段。因为
final关键字保证了字段在构造时一旦初始化完成,其值就不能再被修改,并且这种初始化对所有线程都是可见的。
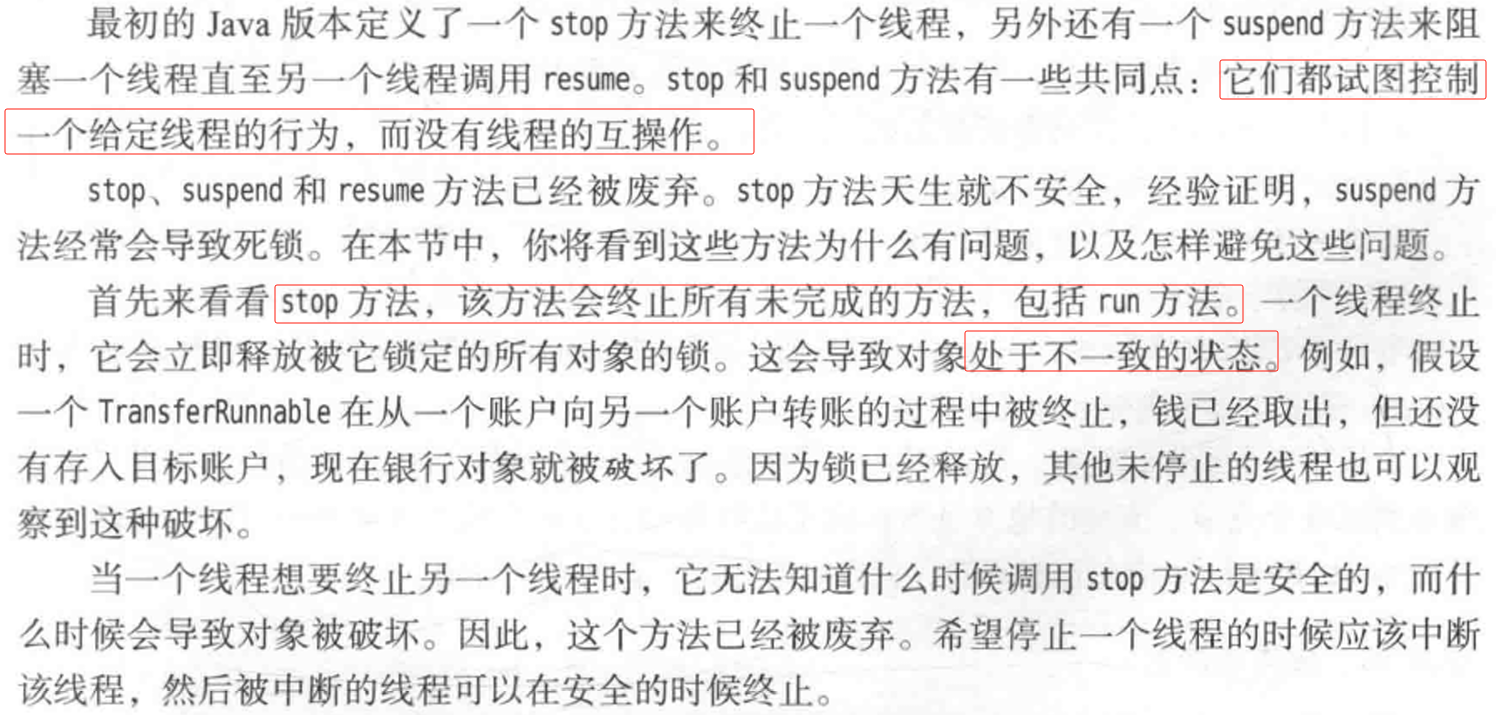
⑧为什么废弃stop和suspend方法

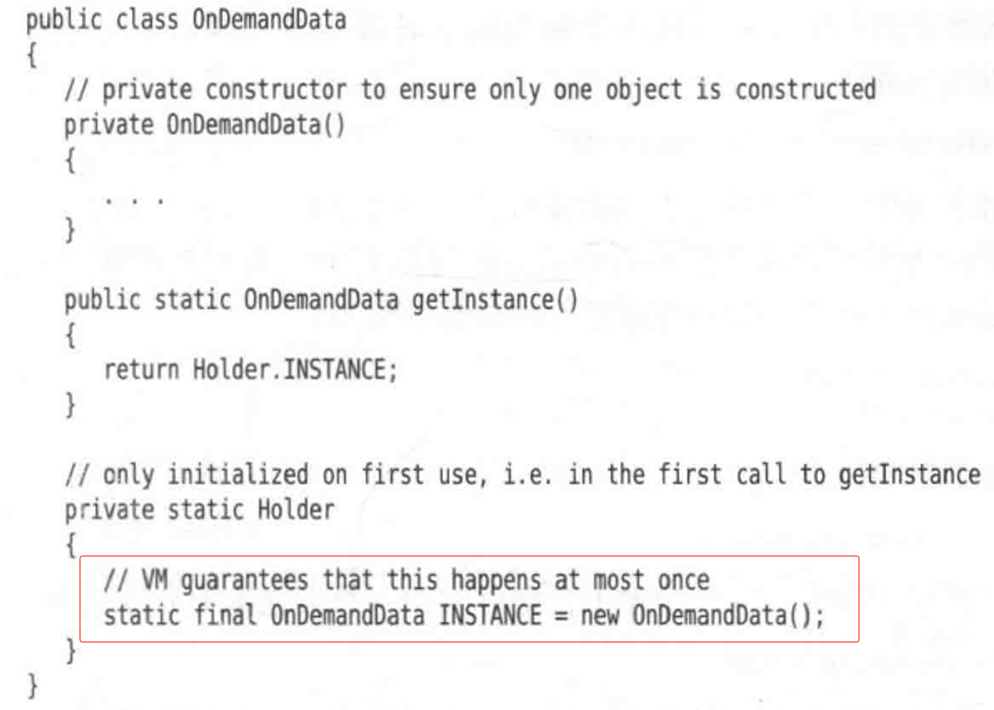
⑨按需初始化
有时对于某些数据结构,可能希望第一次需要它时才进行初始化,且希望确保这种初始化只发生一次。
虚拟机会在第一次使用类时执行一个静态初始化器,而且只执行一次,虚拟机利用一个锁来确保这一点。
⑩线程局部变量
线程局部变量(Thread-Local Variables)是指每个线程都有自己的变量副本,线程之间不会互相干扰。即使多个线程访问同一个变量,每个线程都会有自己独立的副本,其他线程无法看到该副本。这种变量通常用于避免线程间共享数据,从而避免同步问题(采用同步开销过大)。
在 Java 中,可以通过
ThreadLocal类来实现线程局部变量。每个线程会有自己独立的存储空间来保存该变量的值,这样即使不同的线程使用同一个ThreadLocal实例,它们之间的数据也不会相互干扰。ThreadLocal常用于以下几种情况:数据库连接:每个线程可以有自己独立的数据库连接对象,避免线程之间共享同一个连接。
Session 管理:每个线程可以保存自己的
HttpSession,避免不同用户的 session 混淆。线程上下文信息:例如,日志记录中每个线程保存自己独立的用户信息、请求 ID 等上下文数据。

class ThreadLocalExample
{

    // 创建一个ThreadLocal对象
    private static ThreadLocal<Integer> threadLocal = ThreadLocal.withInitial(() -> 0);

    public static void main(String[] args) throws InterruptedException
    {

        // 创建并启动多个线程
        Thread thread1 = new Thread(() ->
        {
            threadLocal.set(10); // 为线程1设置线程局部变量的值
            System.out.println("Thread1 local value: " + threadLocal.get()); // 获取线程局部变量
        });

        Thread thread2 = new Thread(() ->
        {
            threadLocal.set(20); // 为线程2设置线程局部变量的值
            System.out.println("Thread2 local value: " + threadLocal.get()); // 获取线程局部变量
        });

        thread1.start();
        thread2.start();

        thread1.join();
        thread2.join();

        // 主线程访问ThreadLocal
        System.out.println("Main thread local value: " + threadLocal.get());
    }
}
5. 并发集合类
①介绍
Java 提供了一组专门用于处理并发环境下的集合类,称为 并发集合类。这些集合类位于
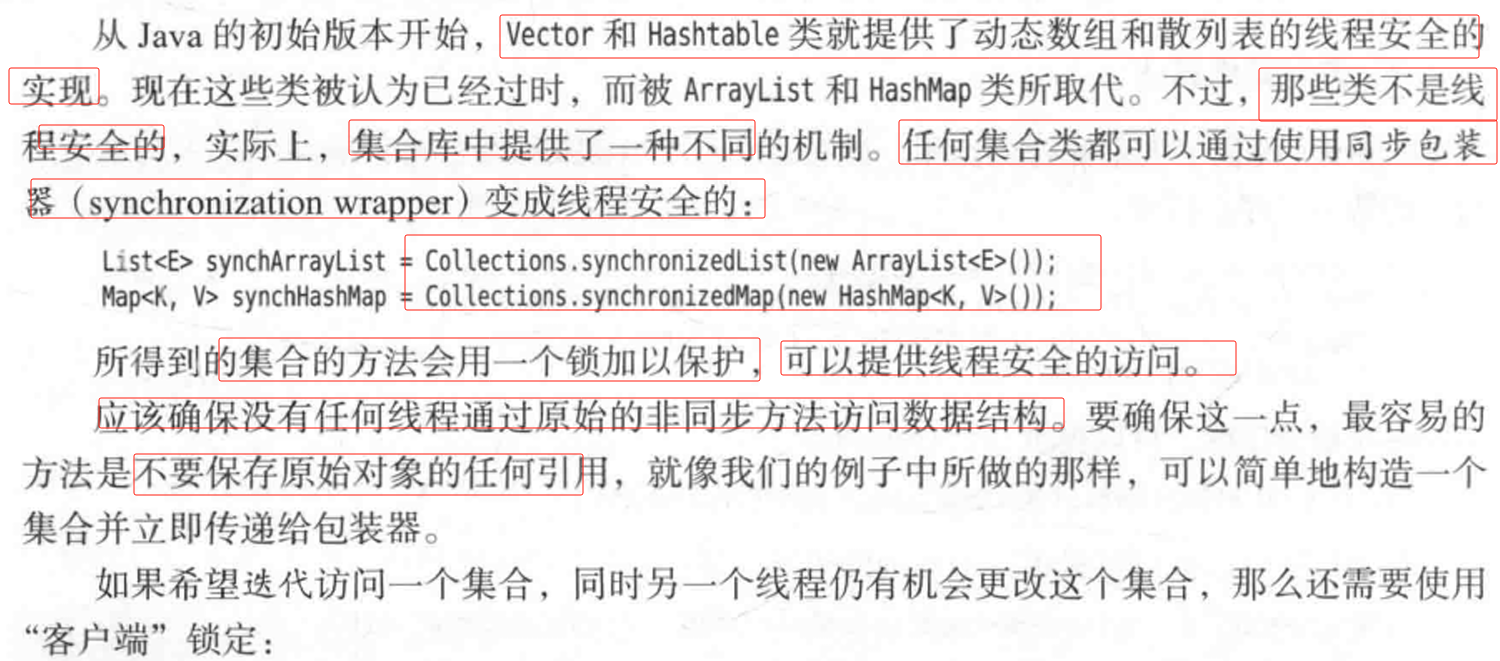
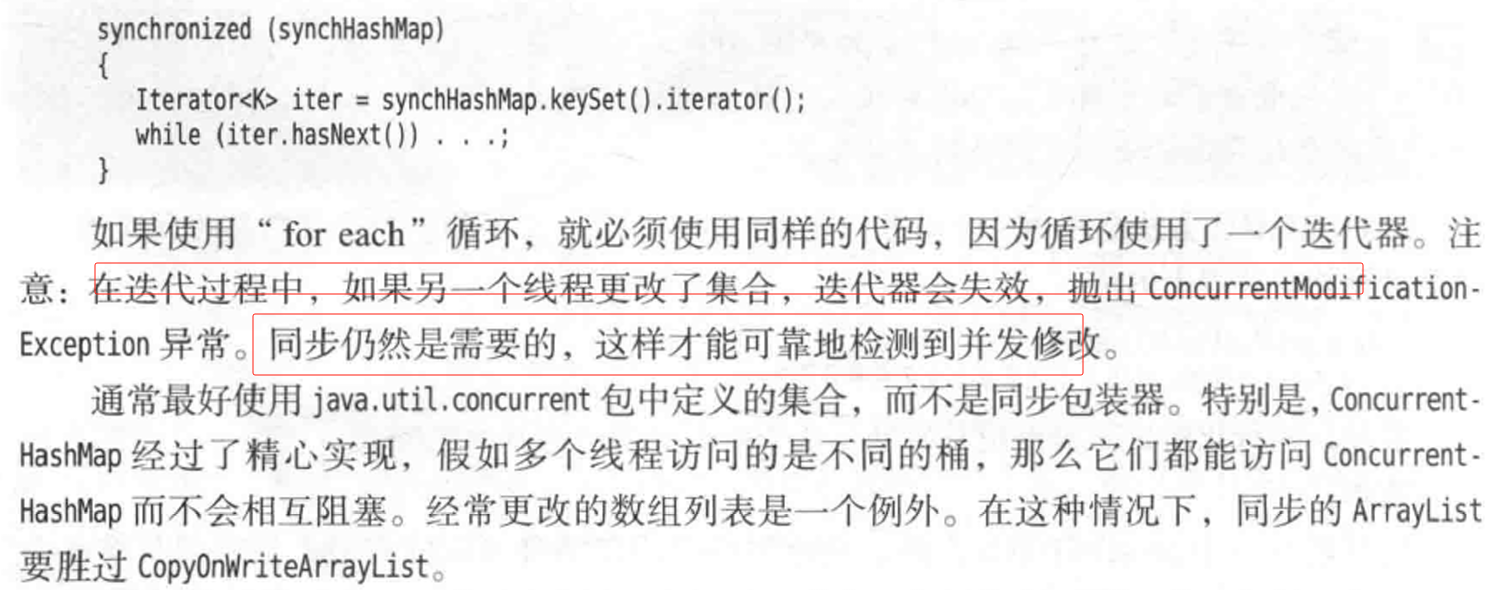
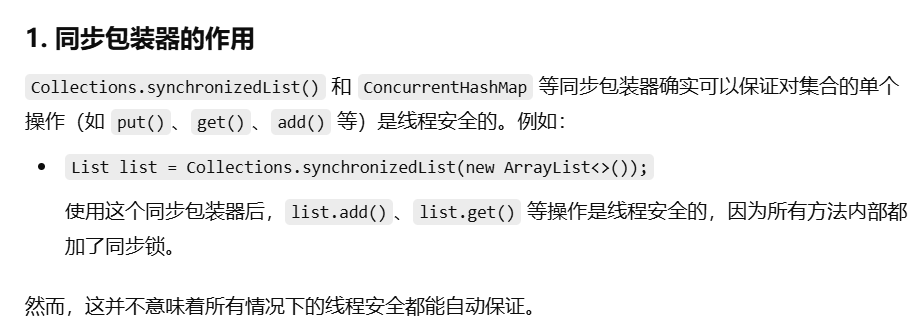
java.util.concurrent包中,旨在解决多线程环境中对集合类进行操作时可能遇到的线程安全问题。与传统的同步集合类(如Vector、Hashtable)相比,并发集合类提供了更高效的并发操作,它们通过内置的同步机制或其他优化策略来保证线程安全。并发集合类的优势:
线程安全:并发集合类采用内部锁机制或无锁设计,以保证多个线程可以安全地并发访问。
高效性:并发集合类通过减少同步开销、使用细粒度锁或无锁设计,提供了比传统集合类更高的并发性能。
增强功能:并发集合类在设计上往往支持更丰富的并发操作,如原子操作、并发读写等。
②ConcurrentHashMap
ConcurrentHashMap是java.util.Map接口的一个实现,支持高效的并发操作。它通过将整个 Map 分割成多个段,每个段有自己的锁,允许多个线程并发访问不同的段。与Hashtable或synchronizedMap不同,ConcurrentHashMap允许多个线程同时读取,并且对写操作提供细粒度锁。线程安全:对
put、get、remove等操作提供并发支持。无阻塞操作:读取操作几乎不需要锁,可以并发进行。
更高的吞吐量:相比于
Hashtable,它能更好地处理大量并发请求。
原子更新:原子操作方法
compute和mergeConcurrentHashMap不允许有null值,很多方法都用null值指示映射中某个给定的键不存在。若传入compute和merge的函数返回null,将从映射中删除现有条目。
并发散列映射的批操作:
在 Java 中,
ConcurrentHashMap提供了对并发操作的支持,并且也支持一些批量操作,这些操作可以显著提高性能,尤其是在高并发环境下。批量操作通常涉及多个键值对的操作,在并发场景中使用批量操作可以减少锁的竞争,提高效率。

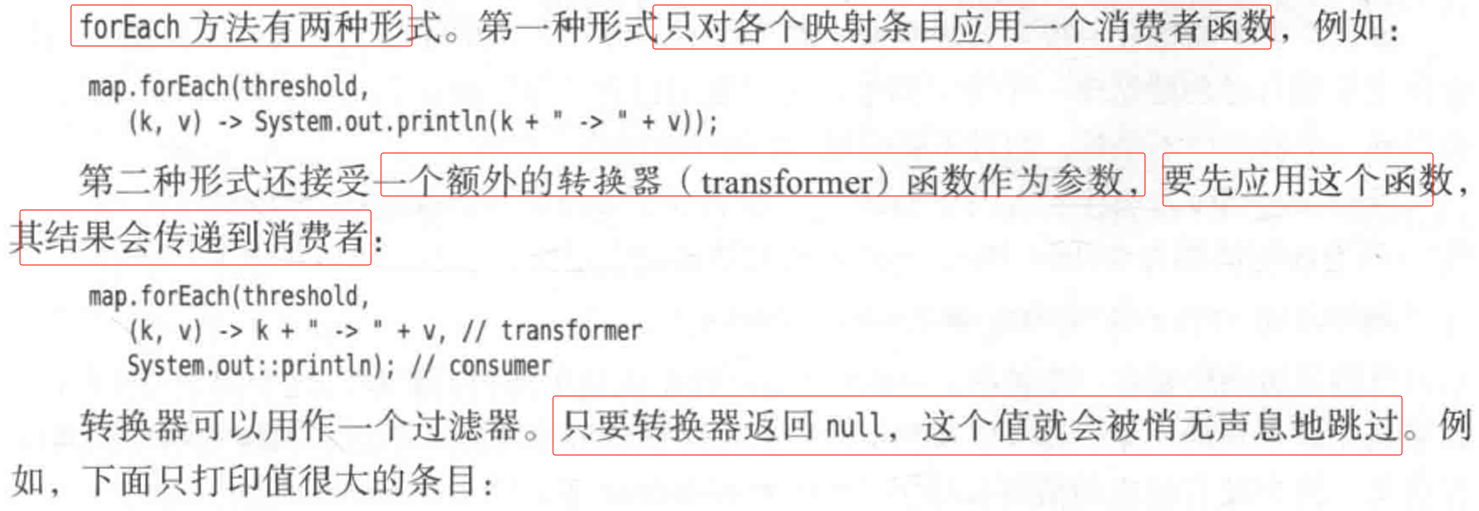
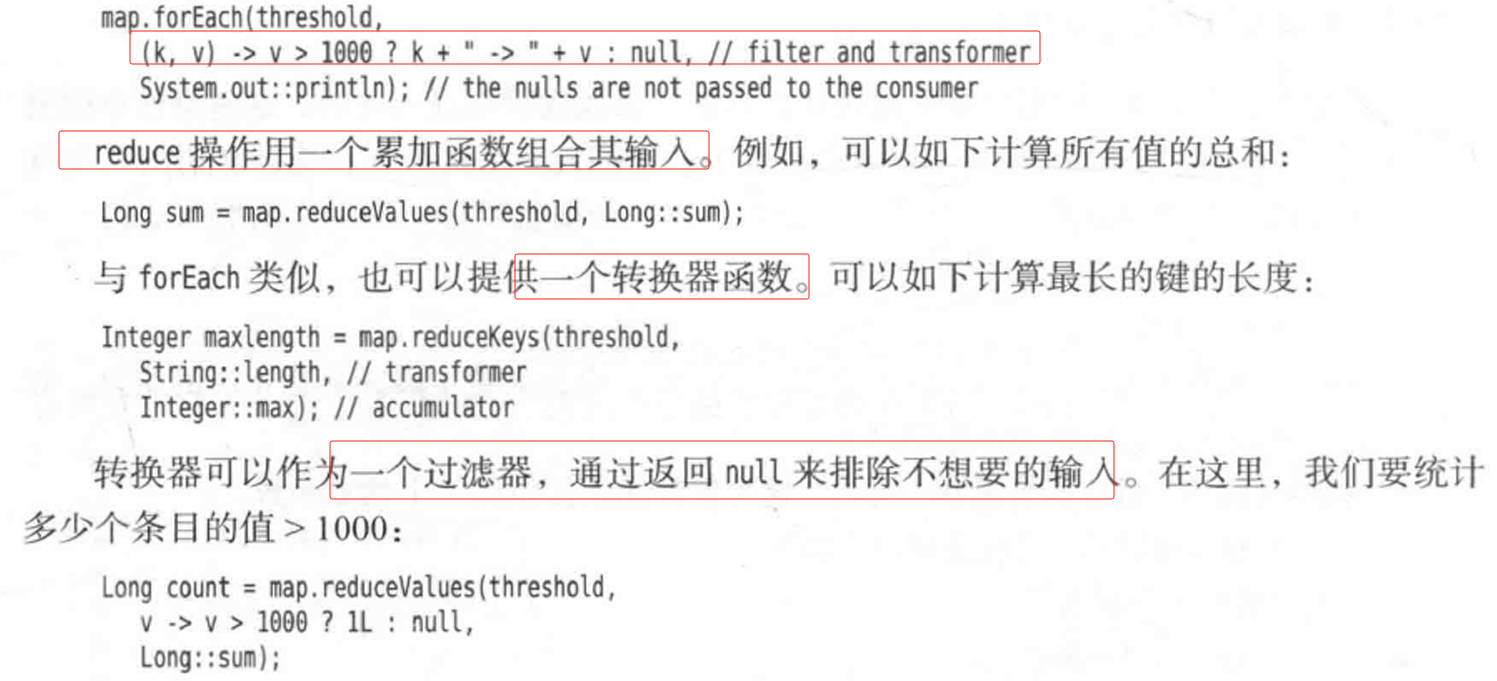

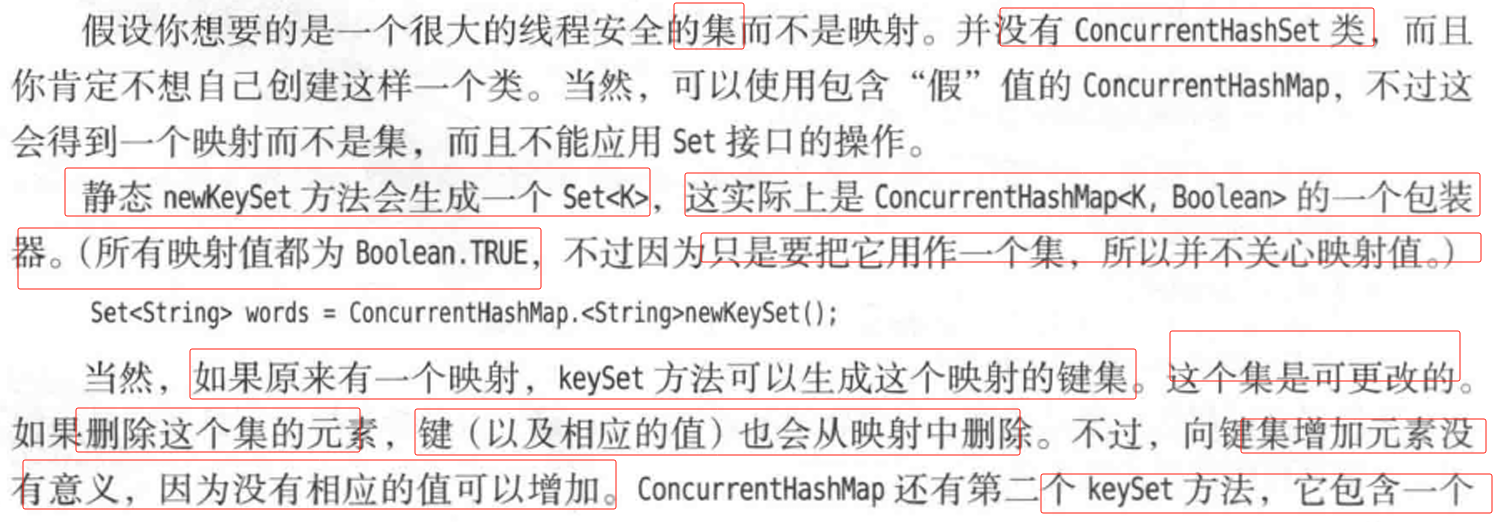
并发集视图:

import java.util.concurrent .*;

public class ConcurrentHashMapExample
{
    public static void main(String[] args)
    {
        ConcurrentHashMap<String, Integer> map = new ConcurrentHashMap<>();

        // 多线程并发插入
        for (int i = 0; i < 10; i++)
        {
            final int index = i;
            new Thread(() ->
            {
                map.put("key" + index, index);
            }).start();
        }

        // 输出所有的键值对
        map.forEach((key, value) -> System.out.println(key + ": " + value));
    }
}
不安全的更新
public class Test
{
static final ConcurrentHashMap<String, Long> map = new ConcurrentHashMap<>();
public static void main(String[] args)
{
String word="wcc";
Long oldv=map.get(word);
Long newv=oldv==null?1:oldv+1;
map.put(word, newv);
}
}
旧版原子更新方法
public class Test
{
static final ConcurrentHashMap<String, Long> map = new ConcurrentHashMap<>();
public static void main(String[] args)
{
String word="wcc";
Long oldv;
Long newv;
do
{
oldv=map.get(word);
newv=oldv==null?1:oldv+1;//只有旧值和map中的一样,即没被别的线程修改,才会更新
}while (!map.replace(word, oldv, newv));
}
}
//旧
public class Test
{
static final ConcurrentHashMap<String, AtomicLong> map = new ConcurrentHashMap<>();
public static void main(String[] args)
{
String word="wcc";
map.putIfAbsent(word, new AtomicLong());
map.get(word).incrementAndGet();//几个方法都是确保了原子性
}
}
新版原子更新方式
ConcurrentHashMap 提供了原子操作方法 compute,
它可以确保在一个原子操作中同时读取、计算和更新值,从而避免上述问题。
public class Test
{
static final ConcurrentHashMap<String, Long> map = new ConcurrentHashMap<>();
public static void main(String[] args)
{
String word = "wcc";
map.compute(word, (key, oldv) -> oldv == null ? 1 : oldv + 1);
}
}
新
ConcurrentHashMap 还提供了 merge 方法,它也是线程安全的,并且可以避免竞争条件。
public class Test
{
static final ConcurrentHashMap<String, Long> map = new ConcurrentHashMap<>();
public static void main(String[] args)
{
String word = "wcc";
merge 方法会将当前值与 1L 合并,如果 word 对应的值不存在,
则设置为 1L,否则将原值与 1L 相加。这个操作是原子的,因此不会发生线程安全问题。
map.merge(word, 1L, Long::sum);
}
}③CopyOnWriteArrayList
CopyOnWriteArrayList是线程安全的ArrayList实现,每当修改操作(如add、remove)发生时,它会创建一个新的副本来保存数据。这使得它非常适合读多写少的场景。虽然add和remove操作会有额外的开销,但读操作是无锁的,可以并发执行。适合场景:读多写少的场景。
线程安全:所有修改操作都会创建副本,保证线程安全。
class CopyOnWriteArrayListExample
{
    public static void main(String[] args)
    {
        CopyOnWriteArrayList<Integer> list = new CopyOnWriteArrayList<>();

        // 启动多个线程进行并发写入
        for (int i = 0; i < 10; i++)
        {
            final int index = i;
            new Thread(() ->
            {
                list.add(index);
            }).start();
        }

        // 读取列表中的元素
        list.forEach(System.out::println);
    }
}
④CopyOnWriteArraySet
CopyOnWriteArraySet是线程安全的Set实现,底层使用CopyOnWriteArrayList来存储元素。它适用于并发读多写少的场景,提供了与HashSet相同的行为,但通过复制集合来保证线程安全。线程安全:类似
CopyOnWriteArrayList,所有写操作都会复制数据。适合场景:读多写少的场景。
public class CopyOnWriteArraySetExample
{
public static void main(String[] args)
{
CopyOnWriteArraySet<String> set = new CopyOnWriteArraySet<>();
// 启动多个线程进行并发写入
for (int i = 0; i < 10; i++)
{
final String value = "element" + i;
new Thread(() ->
{
set.add(value);
}).start();
}
// 读取并输出所有元素
set.forEach(System.out::println);
}
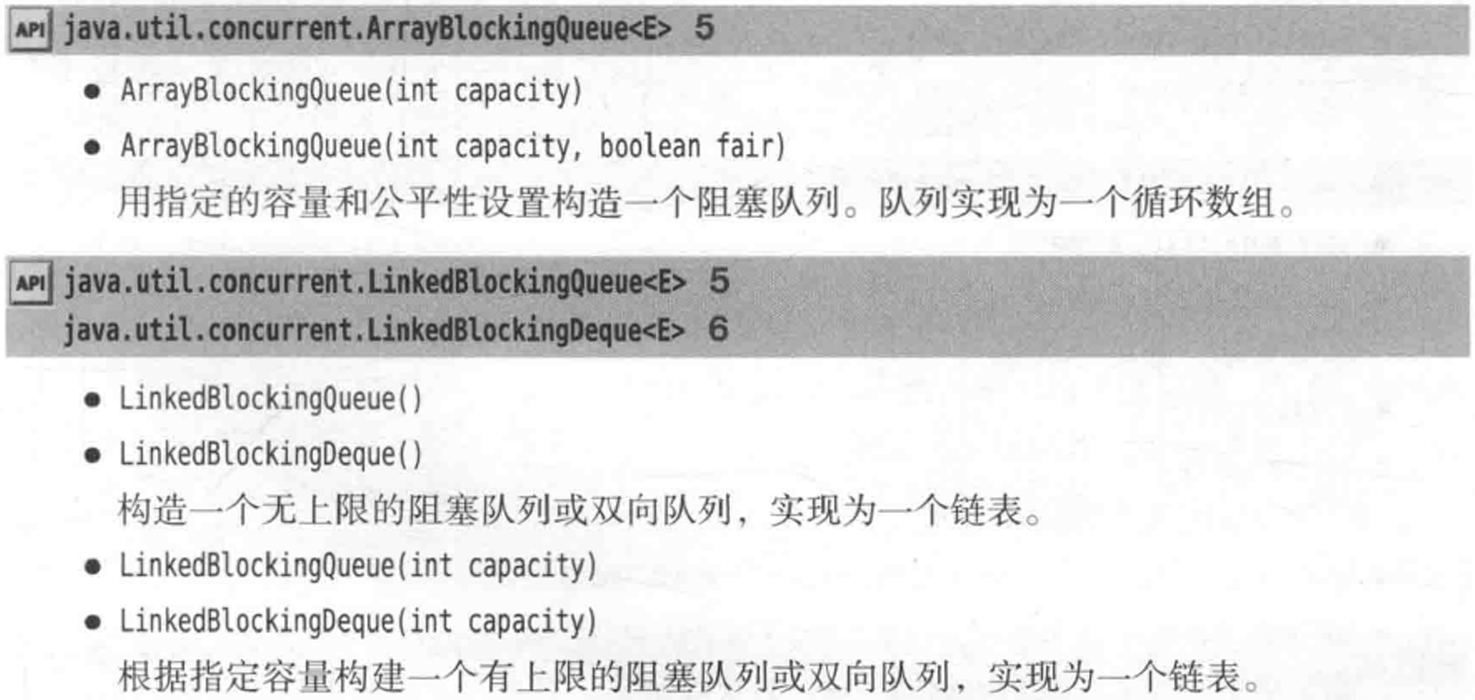
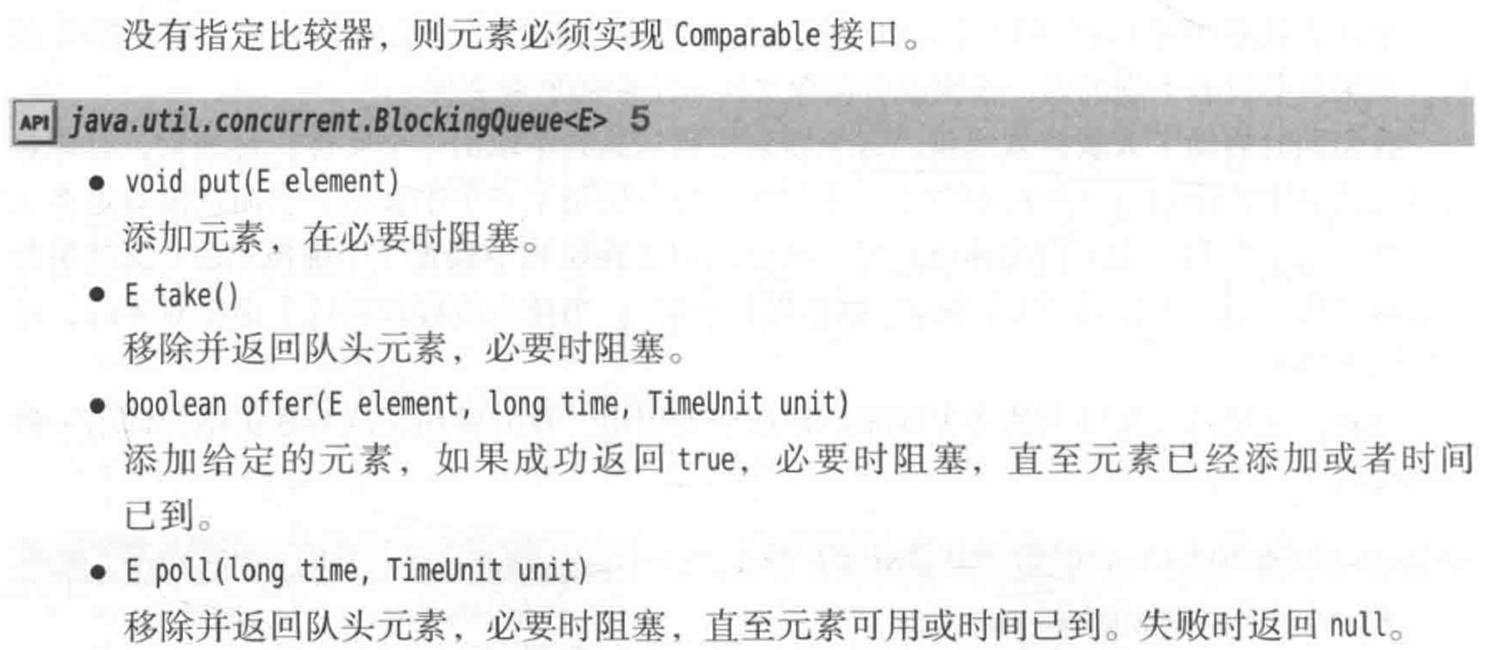
}⑤BlockingQueue 接口及其实现
BlockingQueue是一个用于多线程环境下的线程安全队列。它的主要特点是当队列为空时,消费者线程会被阻塞,直到有新的元素加入;而当队列已满时,生产者线程也会被阻塞,直到有空间可用。BlockingQueue常用于生产者-消费者模式。ArrayBlockingQueue:基于数组的有界阻塞队列, 指定容量。LinkedBlockingQueue:基于链表的阻塞队列,支持可选的容量。PriorityBlockingQueue:具有优先级的阻塞队列,无容量限制。SynchronousQueue:每个put操作都必须等待一个take操作,适用于传递任务的场景。


public class BlockingQueueExample
{
    public static void main(String[] args) throws InterruptedException
    {
        BlockingQueue<Integer> queue = new LinkedBlockingQueue<>(10);

        // 生产者线程
        new Thread(() ->
        {
            for (int i = 0; i < 10; i++)
            {
                try
                {
                    queue.put(i);  // 向队列中插入元素
                    System.out.println("Produced: " + i);
                } catch (InterruptedException e)
                {
                    Thread.currentThread().interrupt();
                }
            }
        }).start();

        // 消费者线程
        new Thread(() ->
        {
            for (int i = 0; i < 10; i++)
            {
                try
                {
                    Integer item = queue.take();  // 从队列中获取元素
                    System.out.println("Consumed: " + item);
                } catch (InterruptedException e)
                {
                    Thread.currentThread().interrupt();
                }
            }
        }).start();
    }
}
⑥ConcurrentSkipListMap 和 ConcurrentSkipListSet
ConcurrentSkipListMap和ConcurrentSkipListSet提供了线程安全的有序映射和集合,底层实现是跳表(Skip List)。这使得它们在多线程环境下也能保持有序性,并且能够高效地支持并发操作。ConcurrentSkipListMap:线程安全的有序映射,支持并发访问。ConcurrentSkipListSet:线程安全的有序集合。
public class ConcurrentSkipListMapExample
{
    public static void main(String[] args)
    {
        ConcurrentSkipListMap<String, Integer> map = new ConcurrentSkipListMap<>();

        // 启动多个线程进行并发写入
        for (int i = 0; i < 10; i++)
        {
            final String key = "key" + i;
            final int value = i;
            new Thread(() ->
            {
                map.put(key, value);
            }).start();
        }

        // 输出有序的键值对
        map.forEach((key, value) -> System.out.println(key + ": " + value));
    }
}
⑦ConcurrentLinkedQueue
ConcurrentLinkedQueue是 Java 中的一种无界线程安全的队列实现,它属于java.util.concurrent包,专为并发环境下设计,能够有效地处理多个线程并发操作队列的问题。ConcurrentLinkedQueue采用了非阻塞的 CAS(Compare-And-Swap) 技术,保证线程安全性,而不会产生线程之间的锁竞争,因此它非常适用于高并发的场景。特性:
无界队列:队列的容量没有上限,随着元素的加入,队列会动态扩展。
线程安全:通过非阻塞算法(CAS)保证了多线程操作时的安全。
FIFO 顺序:遵循先进先出(First In, First Out)的队列规则。
适用于高并发场景:由于使用了 CAS 技术,
ConcurrentLinkedQueue不需要传统的锁机制,能有效减少线程之间的竞争和阻塞,提高性能。常用方法:
offer(E e):将元素e添加到队列的尾部,如果添加成功,则返回true。poll():从队列头部移除并返回一个元素,如果队列为空,则返回null。peek():查看队列头部的元素,但不移除它,如果队列为空,则返回null。isEmpty():检查队列是否为空。size():获取队列中的元素个数。
public class ConcurrentLinkedQueueExample
{
    public static void main(String[] args) throws InterruptedException
    {
        // 创建一个ConcurrentLinkedQueue实例
        ConcurrentLinkedQueue<Integer> queue = new ConcurrentLinkedQueue<>();

        // 启动生产者线程,将元素放入队列
        Thread producer = new Thread(() ->
        {
            for (int i = 0; i < 5; i++)
            {
                queue.offer(i);
                System.out.println("Produced: " + i);
            }
        });

        // 启动消费者线程,从队列中取出元素
        Thread consumer = new Thread(() ->
        {
            for (int i = 0; i < 5; i++)
            {
                Integer value = queue.poll();
                if (value != null)
                {
                    System.out.println("Consumed: " + value);
                }
            }
        });

        // 启动线程
        producer.start();
        consumer.start();

        // 等待线程结束
        producer.join();
        consumer.join();
    }
}
⑧并行数组算法
在 Java 中,处理大规模数据集时,并行数组算法可以显著提高性能,特别是在多核处理器上。通过并行化操作,我们可以在多个 CPU 核心上同时执行计算,从而加速处理过程。Java 提供了一些内置的机制来帮助我们并行化数组的操作,最常见的是使用
parallelStream和Arrays.parallelSort()等方法。parallelStream()是 Java 8 引入的流(Stream)API的一部分,它允许你轻松地并行处理集合,包括数组。使用parallelStream(),Java 会自动将数据拆分成小块,并在多个线程上并行执行操作。Arrays.parallelSort()是 Java 8 引入的方法,它能够对数组进行并行排序。parallelSort()会自动将数组拆分为多个子数组,使用多个线程进行排序,然后将结果合并。Java 8 引入了
IntStream和DoubleStream等原始类型流,它们可以直接进行并行处理,不需要手动装箱。可以通过parallel()方法将流转为并行流。parallelSetAll()是 Java 8 引入的一个方法,属于Arrays类的一部分,主要用于并行化对数组的元素赋值操作。它允许你使用并行流的方式修改数组中的元素,从而充分利用多核处理器进行并行计算。这个操作是基于数组的 索引,而不是元素的值。即lambda x是索引。parallelPrefix()是 Java 8 引入的Arrays类中的一个方法,用于执行并行前缀操作。它可以对数组执行类似累加(prefix sum)、累乘、最大值等操作,并将结果存储在原始数组中。
parallelStream()
public class ParallelArrayExample
{
    public static void main(String[] args)
    {
        int[] arr = {1, 2, 3, 4, 5, 6, 7, 8, 9, 10};

        // 使用 parallelStream 并行求和
        int sum = Arrays.stream(arr)
                .parallel()  // 将流转为并行流
                .sum();

        System.out.println("Sum: " + sum);  // 输出:Sum: 55
    }
}
parallelSort
public class ParallelSortExample
{
public static void main(String[] args)
{
int[] arr = {9, 4, 7, 3, 1, 8, 6, 5, 2, 0};
// 使用 parallelSort 进行并行排序
Arrays.parallelSort(arr);
System.out.println("Sorted Array: " + Arrays.toString(arr));
}
}IntStream
public class ParallelIntStreamExample
{
public static void main(String[] args)
{
int[] arr = {1, 2, 3, 4, 5};
// 使用 IntStream 并行计算平方和
int sumOfSquares = IntStream.of(arr)
.parallel() // 并行处理
.map(x -> x * x)
.sum();
System.out.println("Sum of squares: " + sumOfSquares); // 输出:55
}
}parallelSetAll
class ParallelSetAllExample
{
public static void main(String[] args)
{
int[] array = new int[10];
//
// 使用 parallelSetAll 将数组的每个元素设置为其索引的平方
Arrays.parallelSetAll(array, x->x*x);
// 输出修改后的数组
System.out.println(Arrays.toString(array)); // 输出:[0, 1, 4, 9, 16, 25, 36, 49, 64, 81]
}
}parallelPrefix
public class ParallelPrefixExample
{
public static void main(String[] args)
{
int[] array = {1, 2, 3, 4, 5};
// 使用 parallelPrefix 计算前缀和
Arrays.parallelPrefix(array, (a, b) -> a + b);
// 输出修改后的数组,每个元素是其前缀和
System.out.println(Arrays.toString(array)); // 输出:[1, 3, 6, 10, 15]
}
}⑨较早的线程安全集合


6. 原子变量
①介绍
在 Java 中,原子变量(Atomic Variables)是指通过原子操作(即不可分割的操作)保证线程安全的变量。这些操作通常通过
java.util.concurrent.atomic包中的类来实现,能够确保多个线程对同一变量的并发访问不会导致竞态条件。原子操作是指一系列操作要么完全执行,要么完全不执行,中途不会被其他线程打断。在多线程环境中,原子操作避免了使用锁来保证线程安全,从而减少了性能开销。
Java 提供了原子变量类,这些类中的方法是线程安全的,并且不需要使用同步机制(如
synchronized或Lock)来保证数据一致性。它们利用底层硬件提供的原子操作实现。
作用:
原子变量类的设计目的是简化并发编程,特别是在涉及到简单的数值操作时(如递增、递减、交换等),可以避免使用较重的同步机制(如
synchronized)来保证线程安全。常见的原子操作包括:获取当前值
设置新值
递增(
increment)递减(
decrement)原子比较并交换(CAS)
②AtomicInteger
AtomicInteger是java.util.concurrent.atomic包中最常用的原子变量类之一,用于提供对int类型值的原子操作。它支持线程安全的增减、比较和更新操作。常见方法:
get(): 获取当前值set(int newValue): 设置新值getAndSet(int newValue): 获取当前值并设置为新值incrementAndGet(): 递增并返回新值getAndIncrement(): 获取当前值并递增decrementAndGet(): 递减并返回新值compareAndSet(int expect, int update): 如果当前值等于期望值,则原子地将其更新为新值
import java.util.concurrent.atomic.AtomicInteger;

public class AtomicIntegerExample
{
    public static void main(String[] args)
    {
        AtomicInteger atomicInt = new AtomicInteger(0);

        // 启动多个线程进行并发操作
        for (int i = 0; i < 10; i++)
        {
            new Thread(() ->
            {
                int oldValue = atomicInt.getAndIncrement();
                System.out.println("Old Value: " + oldValue + ", New Value: " + atomicInt.get());
            }).start();
        }
    }
}
③AtomicLong
AtomicLong是AtomicInteger的long类型版本,提供对long类型值的原子操作。其方法与AtomicInteger类似。
import java.util.concurrent.atomic.AtomicLong;

public class AtomicLongExample
{
    public static void main(String[] args)
    {
        AtomicLong atomicLong = new AtomicLong(0);

        // 启动多个线程进行并发操作
        for (int i = 0; i < 10; i++)
        {
            new Thread(() ->
            {
                long oldValue = atomicLong.getAndIncrement();
                System.out.println("Old Value: " + oldValue + ", New Value: " + atomicLong.get());
            }).start();
        }
    }
}
④AtomicBoolean
AtomicBoolean是java.util.concurrent.atomic包中的原子变量类之一,用于提供对布尔值的原子操作。它通常用于表示某个标志位的状态。常见方法:
get(): 获取当前值。set(boolean newValue): 设置新值compareAndSet(boolean expect, boolean update): 如果当前值等于期望值,则将其原子地设置为新值getAndSet(boolean newValue): 获取当前值并设置为新值
public class AtomicBooleanExample
{
    public static void main(String[] args)
    {
        AtomicBoolean atomicBoolean = new AtomicBoolean(false);

        // 启动多个线程进行并发操作
        for (int i = 0; i < 10; i++)
        {
            new Thread(() ->
            {
                boolean oldValue = atomicBoolean.getAndSet(true);
                System.out.println("Old Value: " + oldValue + ", New Value: " + atomicBoolean.get());
            }).start();
        }
    }
}
⑤AtomicReference
AtomicReference是一个用于对对象引用进行原子操作的类。它支持对对象的引用进行安全的更新操作,可以用于需要线程安全操作引用类型的场景。常见方法:
get(): 获取当前引用set(T newValue): 设置新引用compareAndSet(T expect, T update): 如果当前引用等于期望引用,则原子地将其更新为新引用getAndSet(T newValue): 获取当前引用并设置为新引用
public class AtomicReferenceExample
{
    public static void main(String[] args)
    {
        AtomicReference<String> atomicReference = new AtomicReference<>("Initial Value");

        // 启动多个线程进行并发操作
        for (int i = 0; i < 10; i++)
        {
            new Thread(() ->
            {
                String oldValue = atomicReference.getAndSet("New Value");
                System.out.println("Old Value: " + oldValue + ", New Value: " + atomicReference.get());
            }).start();
        }
    }
}
⑥LongAdder
在高并发环境中,多个线程对同一个变量执行加法操作时,使用传统的
AtomicLong会存在一些性能瓶颈。因为AtomicLong使用单一的原子变量来确保线程安全,而这可能导致 线程竞争,在高并发的情况下性能会下降。LongAdder采用了不同的策略来减轻这种竞争。它通过将累加操作分散到多个底层变量上,从而减少了线程竞争的影响,进而提高了性能。适用于高并发的频繁累加操作。LongAdder采用了分段锁的思想,内部维护了多个Cell(一个类似于桶的概念)。每当一个线程执行add()操作时,它会尽量选择一个空闲的Cell进行累加,减少竞争。这使得在高并发场景下,多个线程的累加操作不会频繁争用同一个原子变量,从而提高了效率。add(long delta):将指定的值添加到当前计数器。sum():返回当前计数器的总和。sumThenReset():返回当前计数器的总和,并将计数器重置为 0。reset():将计数器重置为 0,但不会返回当前的总和。
⑦LongAccumulator
LongAccumulator是一个线程安全的可变累加器,它允许通过指定一个累加操作来进行高效的原子操作。与LongAdder不同,LongAccumulator不仅仅局限于累加操作,还支持自定义操作,比如乘法、最大值、最小值等。LongAccumulator的构造函数允许你传入一个 二元操作,并指定一个初始值。这个二元操作用于在累加过程中对两个值进行组合,例如:加法、乘法、求最大值等。构造方法:
public LongAccumulator(LongBinaryOperator op, long identity)op:用于指定累加操作的二元操作,通常是一个LongBinaryOperator,可以是加法、乘法等。identity:指定初始值(即身份值),用于操作的初始状态。-
LongAccumulator的方法:accumulate(long x):将x累加到当前值,使用在构造时指定的二元操作。get():返回当前的累加值。reset():重置累加器的值为初始值。getThenReset():返回当前值并将累加器重置为初始值。
public class LongAccumulatorExample
{
    public static void main(String[] args) throws InterruptedException
    {
        // 使用加法作为累加操作
        LongAccumulator accumulator = new LongAccumulator(Long::sum, 0);

        // 创建多个线程并进行累加操作
        Runnable task = () ->
        {
            for (int i = 0; i < 1000; i++)
            {
                accumulator.accumulate(1);  // 累加 1
            }
        };

        Thread t1 = new Thread(task);
        Thread t2 = new Thread(task);
        Thread t3 = new Thread(task);

        t1.start();
        t2.start();
        t3.start();

        t1.join();
        t2.join();
        t3.join();

        System.out.println("Final sum: " + accumulator.get());  // 输出最终的总和
    }
}
7. 并发工具类
①介绍
在 Java 中,并发工具类是
java.util.concurrent包中的一系列类,它们为开发者提供了更加高效、安全的并发编程支持。这些工具类不仅简化了多线程编程,还解决了许多常见的并发问题,如线程协调、资源共享、任务调度等。
②CountDownLatch
CountDownLatch是一个用于线程间协调的工具,它允许一个或多个线程等待其他线程完成某些操作。它通过一个计数器来控制等待的线程数量,计数器从一个初始值开始,每调用一次countDown()方法,计数器减 1。当计数器为 0 时,所有调用await()的线程会被释放。主要用途:
等待多个线程执行完成后再继续执行某些操作。
用于并发测试中,控制多个线程并发执行直到某个时刻。
public class CountDownLatchExample
{
    public static void main(String[] args) throws InterruptedException
    {
        int threadCount = 3;
        CountDownLatch latch = new CountDownLatch(threadCount);

        // 启动多个线程执行任务
        for (int i = 0; i < threadCount; i++)
        {
            new Thread(() ->
            {
                System.out.println(Thread.currentThread().getName() + " is working...");
                try
                {
                    Thread.sleep(1000);
                } catch (InterruptedException e)
                {
                    e.printStackTrace();
                }
                latch.countDown();  // 每个线程完成任务后调用 countDown
            }).start();
        }

        latch.await();  // 主线程等待所有线程完成
        System.out.println("All threads have completed.");
    }
}
③CyclicBarrier
CyclicBarrier是一个同步辅助工具,它允许一组线程相互等待,直到所有线程都达到某个屏障点(Barrier)。一旦所有线程都到达这个屏障点,所有线程将继续执行。CyclicBarrier可以重用,因此可以用于多次任务的同步。与
CountDownLatch不同,CyclicBarrier可以重用,即在屏障点释放所有线程后,它可以重新开始,允许线程在多次任务执行中重复使用。主要用途:
当多个线程在某些特定步骤上需要同步时。
用于多阶段计算,每个阶段线程都需要等待其他线程。
public class CyclicBarrierExample
{
    public static void main(String[] args)
    {
        // 设定 3 个线程达到屏障后才开始执行
        int threadCount = 3;
        CyclicBarrier barrier = new CyclicBarrier(threadCount, () ->
        {
            // 当所有线程都到达屏障时,执行这段代码
            System.out.println("All threads reached the barrier. Starting the next phase...");
        });

        // 启动多个线程并让它们等待在 barrier
        for (int i = 0; i < threadCount; i++)
        {
            final int index = i;
            new Thread(() ->
            {
                try
                {
                    System.out.println("Thread " + index + " is working...");
                    Thread.sleep(1000);  // 模拟线程的工作
                    System.out.println("Thread " + index + " has reached the barrier.");
                    barrier.await();  // 等待其他线程到达屏障
                    System.out.println("Thread " + index + " is proceeding after the barrier.");
                } catch (InterruptedException | BrokenBarrierException e)
                {
                    e.printStackTrace();
                }
            }).start();
        }
    }
}
④Semaphore
Semaphore是一个计数信号量,它控制对某些资源的访问数量。信号量维护一个许可计数,线程在执行某个操作前需要先获取许可,执行完毕后释放许可。如果没有许可,线程会被阻塞,直到有许可可用。主要用途:
限制对某些资源(如数据库连接、线程池等)的并发访问。
用于实现资源池的控制。
public class SemaphoreExample
{
    public static void main(String[] args) throws InterruptedException
    {
        Semaphore semaphore = new Semaphore(2);  // 允许2个线程同时访问

        // 启动多个线程模拟对共享资源的访问
        for (int i = 0; i < 5; i++)
        {
            final int index = i;
            new Thread(() ->
            {
                try
                {
                    semaphore.acquire();  // 获取许可
                    System.out.println("Thread " + index + " is accessing the resource.");
                    Thread.sleep(1000);  // 模拟处理任务
                    System.out.println("Thread " + index + " has finished.");
                } catch (InterruptedException e)
                {
                    e.printStackTrace();
                } finally
                {
                    semaphore.release();  // 释放许可
                }
            }).start();
        }
    }
}
⑤Exchanger
Exchanger是一种用于线程间交换数据的工具类。两个线程通过exchange()方法交换数据,若两个线程都调用exchange(),它们会阻塞,直到它们都到达交换点并交换数据。主要用途:
在两个线程之间交换对象,通常用于双向通信。
用于并发算法中,线程之间需要交换状态或数据。
public class ExchangerExample
{
    public static void main(String[] args) throws InterruptedException
    {
        Exchanger<String> exchanger = new Exchanger<>();

        // 线程1
        new Thread(() ->
        {
            try
            {
                String data = "Hello from thread 1!";
                String received = exchanger.exchange(data);
                System.out.println("Thread 1 received: " + received);
            } catch (InterruptedException e)
            {
                e.printStackTrace();
            }
        }).start();

        // 线程2
        new Thread(() ->
        {
            try
            {
                String data = "Hello from thread 2!";
                String received = exchanger.exchange(data);
                System.out.println("Thread 2 received: " + received);
            } catch (InterruptedException e)
            {
                e.printStackTrace();
            }
        }).start();
    }
}
⑥ScheduledExecutorService
ScheduledExecutorService是一个扩展ExecutorService的接口,它用于执行定时任务或周期性任务(定期执行某些操作,例如心跳检测、日志清理等)。通过schedule()、scheduleAtFixedRate()等方法,可以在未来某个时刻或定期执行任务。
public class ScheduledExecutorServiceExample
{
    public static void main(String[] args)
    {
        ScheduledExecutorService scheduledExecutorService = Executors.newSingleThreadScheduledExecutor();

        // 延迟1秒后执行任务
        scheduledExecutorService.schedule(() -> System.out.println("Task executed after 1 second"), 1, TimeUnit.SECONDS);

        // 每2秒执行一次任务
        scheduledExecutorService.scheduleAtFixedRate(() -> System.out.println("Periodic task executed"), 0, 2, TimeUnit.SECONDS);
    }
}
⑦Phaser
Phaser是一个允许多个线程参与的同步器,允许线程在多个阶段上同步。在每一阶段,所有参与线程都必须在该阶段结束之前到达屏障点,才能开始下一阶段。与
CyclicBarrier和CountDownLatch不同的是,Phaser具有以下特点:动态参与者:可以在运行时添加或移除参与的线程。
多个阶段:支持多个同步阶段,而不仅限于一个阶段。
灵活的控制:允许线程在每个阶段有不同的“同步策略”。
Phaser的关键方法register():注册一个线程参与到同步的过程中。每次注册一个线程,Phaser的参与者数量就会增加 1。arrive():表示当前线程已到达该阶段的屏障点,参与同步。该线程不等待其他线程到达这个屏障。arriveAndAwaitAdvance():表示当前线程到达了一个阶段的屏障,且等待其他线程到达屏障,直到所有线程都到达该阶段。awaitAdvance(phase):让当前线程等待直到指定的阶段结束。getPhase():返回当前的阶段(Phase)。Phaser的阶段从 0 开始,逐步增加。onAdvance(phase, registeredParties):一个回调方法,允许你自定义每个阶段完成时的操作。getRegisteredParties():获取当前已注册的线程数。getArrivedParties():获取已经到达当前阶段的线程数。getUnarrivedParties():获取还未到达当前阶段的线程数。
Phaser的工作原理Phaser的工作流程是基于阶段(Phase)同步的。在每个阶段,所有线程必须在该阶段的屏障点处等待,直到所有线程都到达该阶段。每个线程在某个阶段的完成后,都会调用arrive()或arriveAndAwaitAdvance()来通知Phaser,然后在所有线程都到达之后,所有线程才能进入下一阶段。
8. 异步计算
①介绍
Future对象调用get获取值时,这个方法会阻塞,直到值可用。
CompletableFuture是 Java 8 引入的一个非常强大的类,它是Future接口的实现,提供了异步编程的更丰富的功能。CompletableFuture不仅支持传统的异步操作(类似于Future的get()和submit()),还提供了链式调用、组合、异常处理等功能,使得异步编程更加灵活和强大。对于
CompletableFuture类可以注册一个回调,一旦结果可用,就会利用该结果调用这个回调,采用这种方式,一旦结果可用就可以对结果进行处理而无需阻塞。非阻塞调用通过回调来实现。
CompletableFuture主要特点:异步执行:
CompletableFuture允许在后台线程中执行任务,并提供方法来处理完成后的结果。链式调用:可以通过
thenApply()、thenAccept()等方法对异步结果进行处理,支持通过链式调用来串联多个异步任务。回调机制:你可以通过
thenRun()、whenComplete()等方法添加回调,这些回调会在任务完成时执行。异常处理:提供了内建的异常处理方法,如
exceptionally()、handle(),用于处理异步任务中可能发生的异常。组合多个
CompletableFuture:你可以通过方法如thenCombine()、thenCompose()等组合多个异步任务。
完成方式:得到一个结果或者有一个未捕获异常。
②supplyAsync
public static <U> CompletableFuture<U> supplyAsync(Supplier<U> supplier)public static <U> CompletableFuture<U> supplyAsync(Supplier<U> supplier, Executor executor)功能:使用
Supplier提供的值异步执行任务,并返回一个CompletableFuture对象。返回值:一个包装了结果的
CompletableFuture。执行器:若省略
Executor会在默认的执行器(ForkJoinPool.commonPool()返回的执行器)上运行。
CompletableFuture<Integer> future = CompletableFuture.supplyAsync(() -> {
    // 模拟异步操作
    return 42;
});
③runAsync
public static CompletableFuture<Void> runAsync(Runnable runnable)public static CompletableFuture<Void> runAsync(Runnable runnable, Executor executor)功能:异步执行一个不返回结果的
Runnable任务。返回值:一个
CompletableFuture<Void>,表示任务的执行状态。执行器:若省略
Executor会在默认的执行器(ForkJoinPool.commonPool()返回的执行器)上运行。
CompletableFuture<Void> future = CompletableFuture.runAsync(() -> {
    // 执行不需要返回值的任务
    System.out.println("Running asynchronously");
});
④结果处理:thenApply()、thenAccept()、thenRun()
thenApply(Function<? super T, ? extends U> fn)功能:当
CompletableFuture完成时,使用Function对结果进行转换。返回一个新的CompletableFuture。返回值:新的
CompletableFuture,其中包装了转换后的结果。-
thenAccept(Consumer<? super T> action)功能:当
CompletableFuture完成时,对结果进行消费,不返回值。返回值:一个
CompletableFuture<Void>。-
thenRun(Runnable action)功能:当
CompletableFuture完成时执行一个Runnable操作,且不使用结果。返回值:一个
CompletableFuture<Void>。
CompletableFuture<Integer> future = CompletableFuture.supplyAsync(() -> 5);
CompletableFuture<Integer> result = future.thenApply(x -> x * 2);  // 结果为 10
***
CompletableFuture<Integer> future = CompletableFuture.supplyAsync(() -> 5);
future.thenAccept(x -> System.out.println("Result: " + x));  // 输出 Result: 5
***
CompletableFuture<Void> future = CompletableFuture.supplyAsync(() -> 5);
future.thenRun(() -> System.out.println("Task complete"));  // 输出 Task complete
⑤whenComplete
whenComplete()是CompletableFuture提供的一个重要方法,它允许你在任务完成时执行一个回调函数,并能够同时处理任务的正常结果和异常。与thenApply()或thenAccept()不同的是,whenComplete()总是会被调用,无论任务是否成功完成,还是抛出了异常。public CompletableFuture<T> whenComplete(BiConsumer<? super T, ? super Throwable> action)参数:
action是一个BiConsumer,接收两个参数:第一个参数:任务的结果(类型是
T)。第二个参数:异常(如果任务完成时抛出了异常),类型是
Throwable。返回值:返回一个新的
CompletableFuture,它代表当前的任务。
特点:
不管任务是否成功完成,
whenComplete()中的回调都会被执行。如果任务执行成功,
action的第一个参数会是结果,第二个参数是null。如果任务执行失败,
action的第一个参数是null,第二个参数包含异常信息。与
exceptionally()和handle()不同,whenComplete()本身不会修改或处理任务的结果或异常,它只是执行一个副作用操作,例如日志记录、清理资源等。
class WhenCompleteExample
{
    public static void main(String[] args)
    {
        CompletableFuture<Integer> future = CompletableFuture.supplyAsync(() ->
        {
            int result = 10 / 2; // 正常计算
            return result;
        });

        future.whenComplete((result, ex) ->
        {
            if (ex == null)
            {
                System.out.println("Task completed successfully with result: " + result);
            } else
            {
                System.out.println("Task failed with exception: " + ex.getMessage());
            }
        });

        // 如果是异常的任务
        CompletableFuture<Integer> futureWithError = CompletableFuture.supplyAsync(() ->
        {
            int result = 10 / 0; // 会抛出异常
            return result;
        });

        futureWithError.whenComplete((result, ex) ->
        {
            if (ex == null)
            {
                System.out.println("Task completed successfully with result: " + result);
            } else
            {
                System.out.println("Task failed with exception: " + ex.getMessage());
            }
        });
    }
}
⑥isDone/join/get
isDone()是CompletableFuture中的一个方法,用于检查异步任务是否已完成。它会返回一个布尔值,指示任务是否已经完成,无论是成功完成、被取消还是由于异常失败。join():功能:等待任务执行完成,并获取任务结果。如果任务执行过程中抛出异常,join()会抛出CompletionException。返回值:任务的结果。get():功能:等待任务执行完成,并返回任务结果。get()方法会阻塞直到任务完成。如果任务在执行过程中抛出异常,它会将异常包装在ExecutionException中抛出。返回值:任务的结果。
⑦组合可完成Future
组合可完成的任务(
CompletionStage)是指通过不同的 API 方法将多个异步任务结合在一起,从而创建更复杂的任务链。这使得我们能够通过链式操作来组合任务并处理任务间的依赖关系。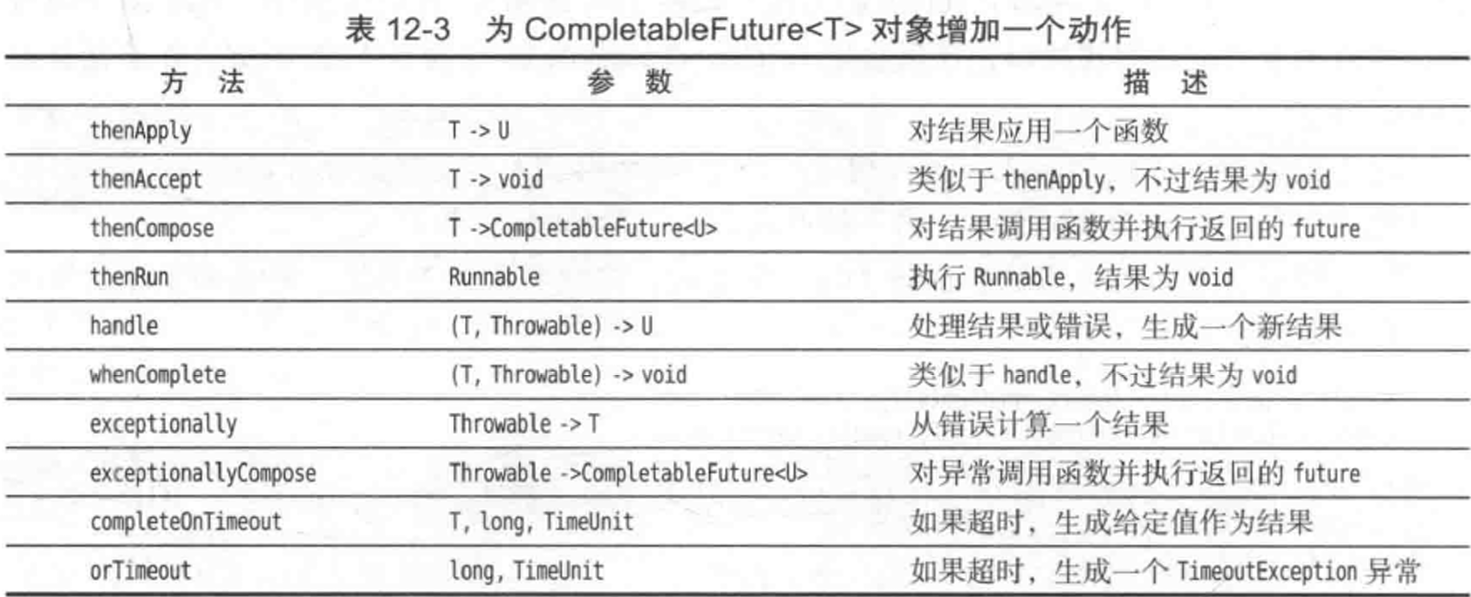
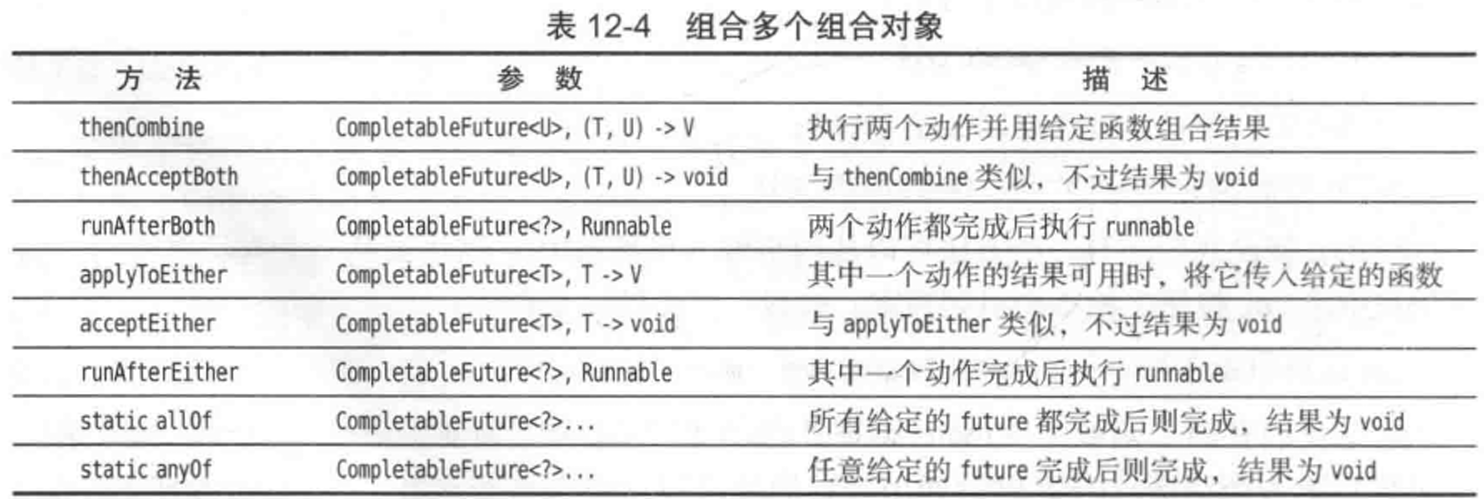


thenCombine() 用于将两个 CompletableFuture 完成时的结果组合起来,
执行一个 BiFunction 来处理两个结果,并返回一个新的 CompletableFuture。
public <U, V> CompletableFuture<V> thenCombine(
    CompletableFuture<? extends U> other,
    BiFunction<? super T, ? super U, ? extends V> fn)

参数:
other:另一个 CompletableFuture,当两个任务都完成时执行。
fn:用于组合两个任务结果的 BiFunction。
返回值:返回一个新的 CompletableFuture,包含组合后的结果。

public class ThenCombineExample
{
    public static void main(String[] args)
    {
        CompletableFuture<Integer> future1 = CompletableFuture.supplyAsync(() -> 10);
        CompletableFuture<Integer> future2 = CompletableFuture.supplyAsync(() -> 20);

        CompletableFuture<Integer> result = future1.thenCombine(future2, (x, y) -> x + y);  // 组合两个结果

        result.thenAccept(res -> System.out.println("Combined result: " + res));  // 输出 Combined result: 30
    }
}
thenCompose() 用于将两个异步操作串联起来。它的作用是将前一个 CompletableFuture 的结果作为下一个 CompletableFuture 的输入,
并且返回一个新的 CompletableFuture。
public <U> CompletableFuture<U> thenCompose(
Function<? super T, ? extends CompletableFuture<U>> fn)
参数:fn:一个 Function,接受当前任务的结果,并返回一个新的 CompletableFuture。
返回值:返回一个新的 CompletableFuture,其结果是由 fn 返回的 CompletableFuture。
public class ThenComposeExample
{
public static void main(String[] args)
{
CompletableFuture<Integer> future1 = CompletableFuture.supplyAsync(() -> 10);
CompletableFuture<Integer> result = future1.thenCompose(x ->
CompletableFuture.supplyAsync(() -> x * 2)); // 使用前一个任务的结果来执行下一个任务
result.thenAccept(res -> System.out.println("Final result: " + res)); // 输出 Final result: 20
}
}allOf() 用于等待多个 CompletableFuture 同时完成。它返回一个新的 CompletableFuture,
该 CompletableFuture 只有在所有给定的任务都完成时才会完成。
public static CompletableFuture<Void> allOf(CompletableFuture<?>... cfs)
参数:多个 CompletableFuture 对象。
返回值:返回一个新的 CompletableFuture<Void>,只有当所有的任务都完成时才会完成。
public class AllOfExample
{
public static void main(String[] args)
{
CompletableFuture<Integer> future1 = CompletableFuture.supplyAsync(() -> 10);
CompletableFuture<Integer> future2 = CompletableFuture.supplyAsync(() -> 20);
CompletableFuture<Void> allOf = CompletableFuture.allOf(future1, future2);
allOf.thenRun(() ->
{
try
{
// 获取两个任务的结果
System.out.println("Task 1 result: " + future1.get());
System.out.println("Task 2 result: " + future2.get());
} catch (Exception e)
{
e.printStackTrace();
}
});
}
}anyOf() 用于等待多个 CompletableFuture 中的任意一个完成。
它返回一个新的 CompletableFuture,该 CompletableFuture 会在最先完成的任务完成时立即完成。
public static CompletableFuture<Object> anyOf(CompletableFuture<?>... cfs)
参数:多个 CompletableFuture 对象。
返回值:返回一个新的 CompletableFuture<Object>,包含最先完成的任务的结果。
public class AnyOfExample
{
public static void main(String[] args)
{
CompletableFuture<Integer> future1 = CompletableFuture.supplyAsync(() ->
{
try
{
Thread.sleep(2000);
} catch (InterruptedException e)
{
e.printStackTrace();
}
return 10;
});
CompletableFuture<Integer> future2 = CompletableFuture.supplyAsync(() ->
{
try
{
Thread.sleep(1000);
} catch (InterruptedException e)
{
e.printStackTrace();
}
return 20;
});
CompletableFuture<Object> anyOf = CompletableFuture.anyOf(future1, future2);
anyOf.thenAccept(res -> System.out.println("First completed result: " + res)); // 输出 First completed result: 20
}
}handle() 方法不仅处理成功的结果,还能处理异常,它提供了一个 BiFunction,允许你对任务的结果或异常进行处理。
public <U> CompletableFuture<U> handle(
BiFunction<? super T, Throwable, ? extends U> fn)
参数:
fn:一个 BiFunction,接收任务的正常结果和异常(如果有的话),并返回一个新的结果。
返回值:返回一个新的 CompletableFuture,其结果是处理后的值。
class HandleExample
{
public static void main(String[] args)
{
CompletableFuture<Integer> future = CompletableFuture.supplyAsync(() ->
{
if (true) throw new RuntimeException("Something went wrong");
return 10;
});
CompletableFuture<Integer> result = future.handle((res, ex) ->
{
if (ex != null)
{// 输出 Handled exception: Something went wrong
System.out.println("Handled exception: " + ex.getMessage());
return -1; // 返回默认值
} else
{
return res;
}
});
//Result: -1
result.thenAccept(res -> System.out.println("Result: " + res));
}9. 进程
①介绍
进程是一个程序在执行时的实例。它是计算机中资源管理的基本单位,每个进程都拥有独立的内存空间、代码、数据以及系统资源。进程是操作系统(调度)和执行程序的基础单位。
进程:
拥有独立的内存空间,每个进程之间互相隔离。
进程之间的通信比较复杂(需要使用进程间通信机制,如管道、消息队列、共享内存等)。
一个进程可以包含多个线程。
线程:
线程是进程中的一个执行单元,多个线程共享同一进程的内存空间。
线程之间的通信较为简单,通常通过共享内存或全局变量来实现。
创建和销毁线程的开销比进程小。
线程:在同一个程序的不同线程中执行Java代码。
进程:执行另一个程序。
②创建和启动进程
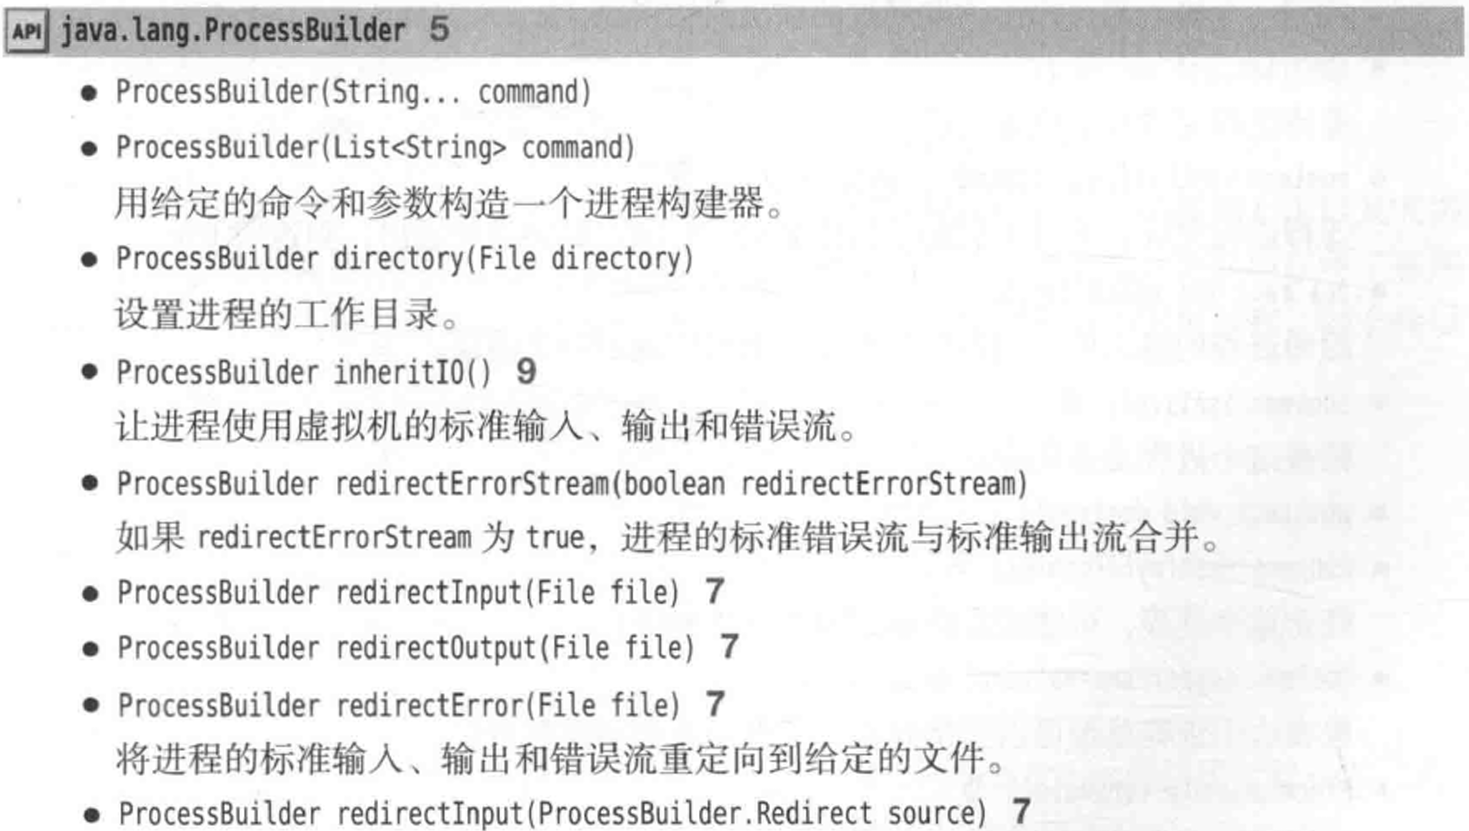
Runtime类是 Java 提供的一个类,它允许你与 Java 虚拟机(JVM)及操作系统进行交互,包括启动新进程、运行外部命令等。通过Runtime.getRuntime().exec()方法可以启动一个外部进程。ProcessBuilder类提供了更灵活的方式来启动和管理进程。你可以通过它传递命令参数、设置环境变量、获取进程的输入输出等。
使用 Runtime 类
public class RuntimeExample
{
    public static void main(String[] args)
    {
        try
        {
            // 使用 Runtime 类启动一个外部进程(在这里是 "notepad.exe")
            Process process = Runtime.getRuntime().exec("notepad.exe");

            // 等待进程结束
            process.waitFor();
            System.out.println("Notepad has been closed.");
        } catch (IOException | InterruptedException e)
        {
            e.printStackTrace();
        }
    }
}
使用 ProcessBuilder 类
public class ProcessBuilderExample
{
public static void main(String[] args)
{
try
{
// 使用 ProcessBuilder 启动外部进程
ProcessBuilder builder = new ProcessBuilder("notepad.exe");
Process process = builder.start();
// 等待进程结束
process.waitFor();
System.out.println("Notepad has been closed.");
} catch (IOException | InterruptedException e)
{
e.printStackTrace();
}
}
}③与进程的输入输出交互
获取进程的输出
你可以获取外部进程的标准输出流(stdout),并读取其返回结果
public class ProcessOutputExample
{
    public static void main(String[] args)
    {
        try
        {
            // 使用 ProcessBuilder 启动外部命令(例如:dir 或 ls)
            ProcessBuilder builder = new ProcessBuilder("dir");
            builder.redirectErrorStream(true);  // 合并错误输出流和标准输出流
            Process process = builder.start();

            // 读取进程的输出
            InputStream inputStream = process.getInputStream();
            BufferedReader reader = new BufferedReader(new InputStreamReader(inputStream));
            String line;
            while ((line = reader.readLine()) != null)
            {
                System.out.println(line);
            }

            // 等待进程结束
            process.waitFor();
        } catch (IOException | InterruptedException e)
        {
            e.printStackTrace();
        }
    }
}
向进程输入数据
你可以向进程的输入流(stdin)发送数据,通常用于与进程交互
class ProcessInputExample
{
public static void main(String[] args)
{
try
{
// 启动一个命令行进程(例如:cmd 或 bash)
ProcessBuilder builder = new ProcessBuilder("cmd");
Process process = builder.start();
// 向进程发送命令(例如:echo Hello)
OutputStream outputStream = process.getOutputStream();
BufferedWriter writer = new BufferedWriter(new OutputStreamWriter(outputStream));
writer.write("echo Hello\n");
writer.flush();
writer.close();
// 获取进程输出
InputStream inputStream = process.getInputStream();
BufferedReader reader = new BufferedReader(new InputStreamReader(inputStream));
String line;
while ((line = reader.readLine()) != null)
{
System.out.println("进程输出"+line);
}
// 等待进程结束
process.waitFor();
} catch (IOException | InterruptedException e)
{
e.printStackTrace();
}
}
}④进程管理
获取进程的退出状态
每个进程都有一个退出状态,通常表示进程是否成功执行。如果进程成功退出,
通常退出状态为 0,如果出错则为非零值。
public class ProcessExitStatusExample
{
    public static void main(String[] args)
    {
        try
        {
            // 启动外部命令
            Process process = Runtime.getRuntime().exec("dir");

            // 获取进程的退出状态
            int exitCode = process.waitFor();
            System.out.println("Process exit code: " + exitCode);
        } catch (IOException | InterruptedException e)
        {
            e.printStackTrace();
        }
    }
}
检查进程是否已完成
可以使用 Process.isAlive() 来检查一个进程是否仍在运行。
public class ProcessAliveExample
{
public static void main(String[] args)
{
try
{
// 启动一个长期运行的进程
Process process = Runtime.getRuntime().exec("ping -t 127.0.0.1");
// 检查进程是否还在运行
while (process.isAlive())
{
System.out.println("Process is still running...");
Thread.sleep(1000); // 等待1秒钟
}
System.out.println("Process has finished.");
} catch (IOException | InterruptedException e)
{
e.printStackTrace();
}
}
}⑤设置进程的工作目录和环境变量
可以通过
ProcessBuilder设置进程的工作目录和环境变量。这对于需要特定环境配置的进程非常有用。
public class ProcessEnvironmentExample
{
    public static void main(String[] args)
    {
        try
        {
            // 设置进程的工作目录和环境变量
            ProcessBuilder builder = new ProcessBuilder("java", "-version");
            builder.directory(new File("C:\\Program Files\\Java\\jdk-11.0.8\\bin"));
            builder.environment().put("MY_ENV_VAR", "SomeValue");

            Process process = builder.start();

            // 获取进程输出
            InputStream inputStream = process.getInputStream();
            BufferedReader reader = new BufferedReader(new InputStreamReader(inputStream));
            String line;
            while ((line = reader.readLine()) != null)
            {
                System.out.println(line);
            }

            process.waitFor();
        } catch (IOException | InterruptedException e)
        {
            e.printStackTrace();
        }
    }
}
⑥进程的错误输出
如果进程遇到错误,它会将错误信息输出到标准错误流(stderr)。你可以通过
Process.getErrorStream()获取该流并进行读取。
public class ProcessErrorExample
{
public static void main(String[] args)
{
try
{
// 执行一个错误的命令
Process process = Runtime.getRuntime().exec("nonexistent_command");
// 获取错误输出
InputStream errorStream = process.getErrorStream();
BufferedReader reader = new BufferedReader(new InputStreamReader(errorStream));
String line;
while ((line = reader.readLine()) != null)
{
System.out.println("Error: " + line);
}
process.waitFor();
} catch (IOException | InterruptedException e)
{
e.printStackTrace();
}
}
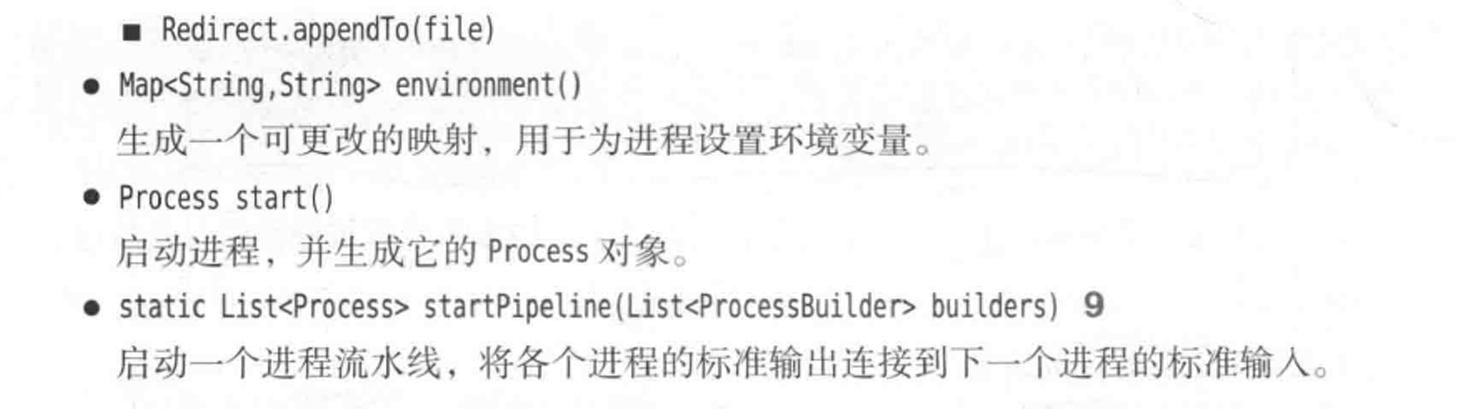
}⑦进程句柄
进程句柄(Process Handle) 是操作系统中用于唯一标识和操作进程的一个引用或指针。在许多操作系统中,进程句柄是操作系统内核用来管理进程的标识符。通过进程句柄,程序可以对进程进行操作,如获取进程的状态、终止进程、等待进程结束等。
在 Java 中,进程句柄 并不是一个显式的概念,Java 程序通过
Process对象来管理和控制外部进程。Process对象在 Java 中充当了进程的“句柄”,通过它,你可以与外部进程进行交互,如获取进程的输出、输入,等待进程结束,或者终止进程等。